Most people think it’s easy to use a chainsaw to cut up a tree. They may even own a chainsaw and use it to cut around their home or cut firewood. Yet, to be safe when using a chainsaw, one should be fully aware of how to properly use the chainsaw to prevent serious injuries and/or death. I see people all the time cutting around their homes using a chain saw while only wearing shorts, and won-tonly cutting here and there. The truth is there are certain characteristics of a chainsaw operation, and chainsaw use that the saw operator, known as a sawyer, should be aware of in order to operate the saw in a safe manner.
To that end, the landowners (generally state or federal agencies) of the land the Appalachian Trail passes though, require that Appalachian Trail Maintainers whom operate chainsaws be certified to US Forest Service Chainsaw operator safety guidelines.
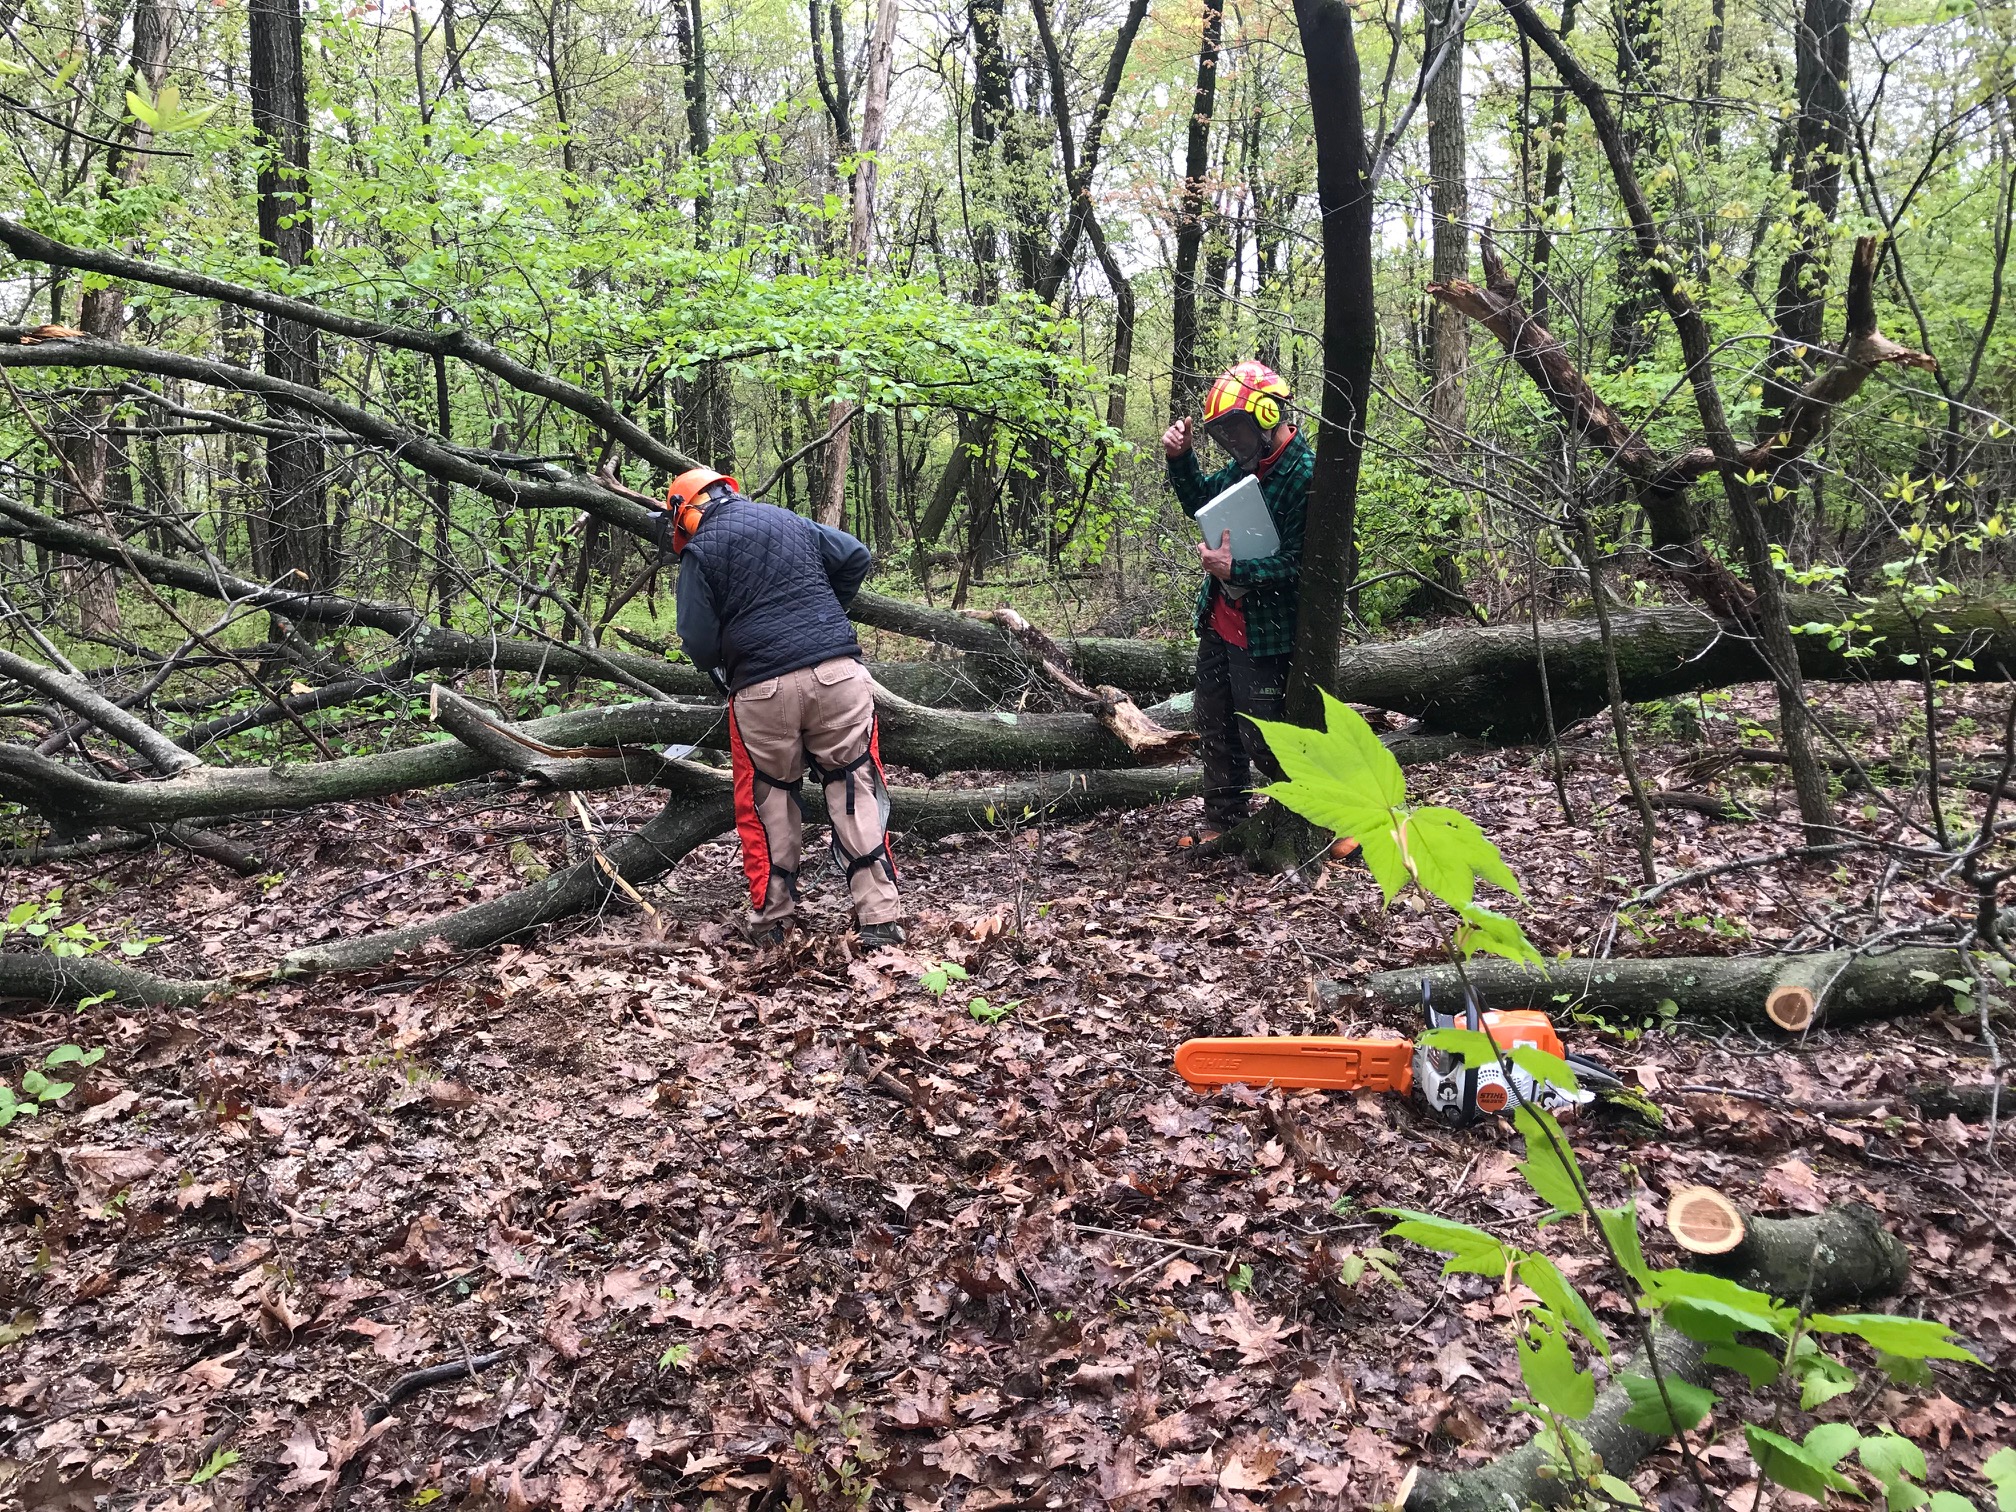
Making a bypass cut at USFS Chainsaw Certification Class
Among other things, one must wear the proper Personal Protective Equipment, including rated chainsaw chaps to protect legs, a hardhat, safety glasses (a screen alone on the hat that does not meet eye safety rules), gloves, and boots. In addition one must attend an initial two day chainsaw operators certification class. Every three years thereafter the operator must attend a one day recertification class.
Some may think, “Hey, I use a chainsaw, I don’t need that class.” Yet, in working using a chainsaw on the Appalachian Trail, one is in difficult places to reach and it could be hours before a rescue crew can reach you. Everyone will learn something at the classes to help their own safe operation of a chainsaw both in their personal use, and more importantly at remote worksite locations along the Appalachian Trail.
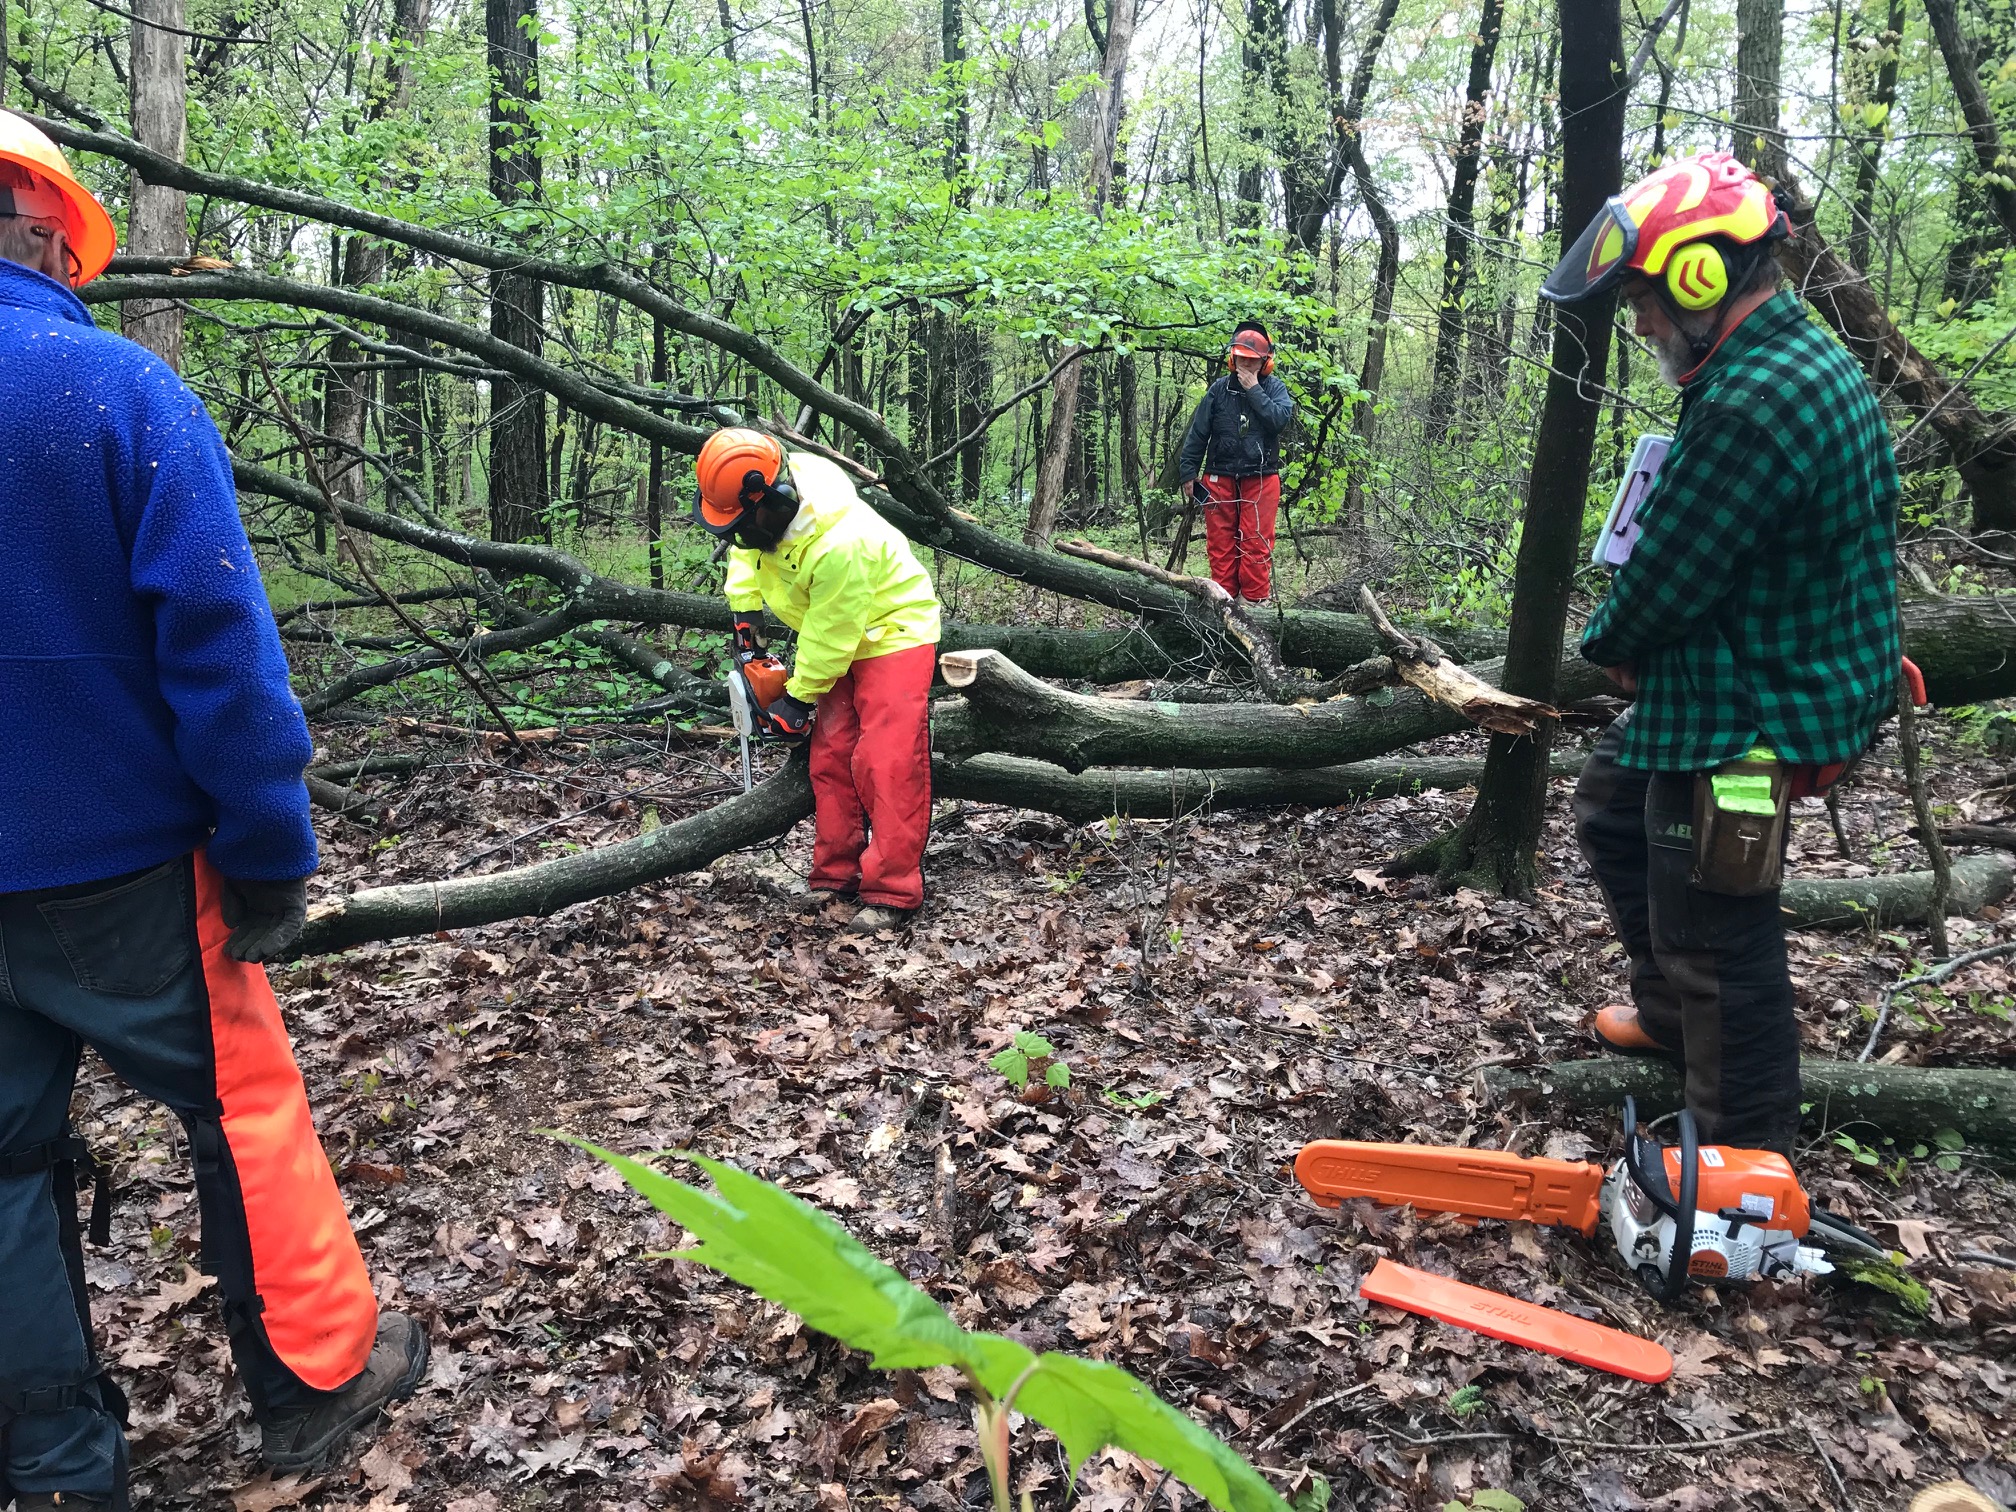
Sawyer making safe cut on the lower limb.
I attended my third chainsaw certification class yesterday. It was held at the 501 Shelter located near Hamburg, PA along PA Route 501. It was attended by 7 sawyers renewing their chainsaw certification. The class was managed by Bob Sickley of the Appalachian Trail Conservancy, and taught by Peter Jensen, a US Forest Service Certified Sawyer Trainer and operator of a professional trail building company Peter S. Jensen & Associates, LLC.
Appalachian Trail Sawyer trainee limbing off branches as Sawyer Trainer looks onThis is the very next cut. ATC Chainsaw Sawyer trainee making bypass cut while observed by trainer, swamper and classmate.
The class starts with 3 hours of professional saw operation instruction, and follows with 5 hours of hands on sawyer training where one of the crew cuts, and a second person is their helper, known as a swamper. The rest of the students observe the work, and after each cut critique the work.
It’s a very worthwhile program, especially considering the varying levels of experience that Appalachian Trail Volunteers bring with them to the trail maintenance efforts.
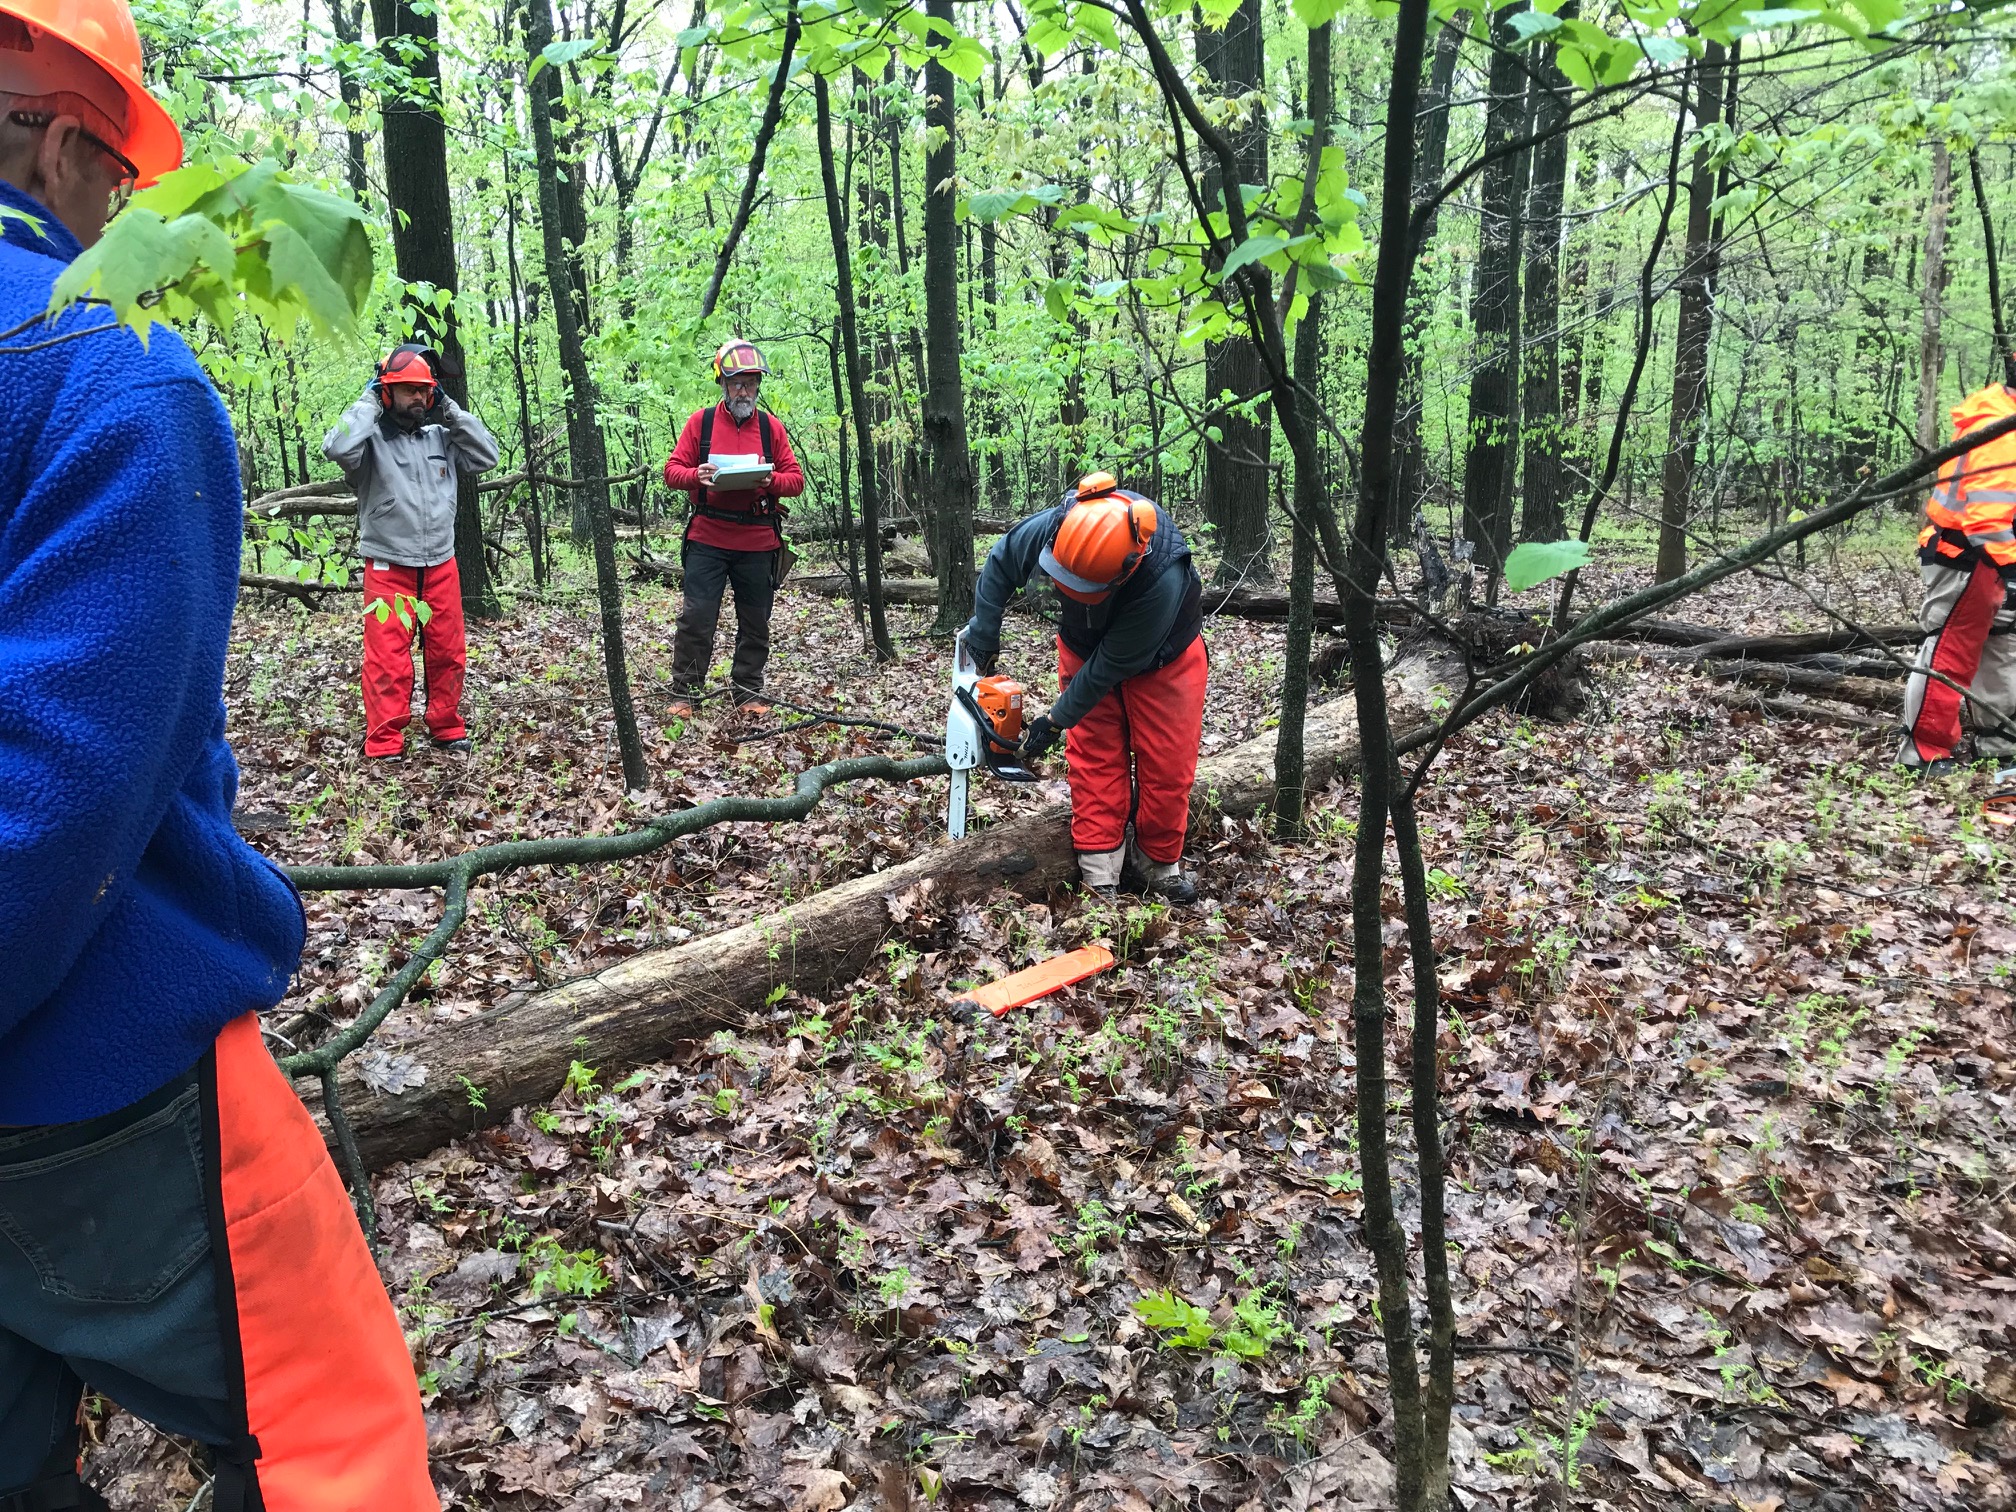
Appalachian Trail Sawyer trainee making bypass cut on tree lying on ground while being observed by classmates and trainer
This AT Sawyer training class was run by Appalachian Trail Conservancy. Information on being an AT Certified Sawyer is available on their website. The trainer at this AT Sawyer re-cerification class was Peter Jensen, who has decades of experience with chainsaws, the Appalachian Trail and is also a professional trail builder that operates a company called Trail Builders
Information on volunteering on the AT in general can be found below:
New To AT Sign at Parking
The Appalachian Trail from US-40 to Annapolis Rocks is by far the most used section of the AT in Maryland. Maybe by a factor of 100 to 1. Many of the people that come here have never hiked on the Appalachian Trail and getting to it here is a little different because of changes made when Maryland was building I-70.
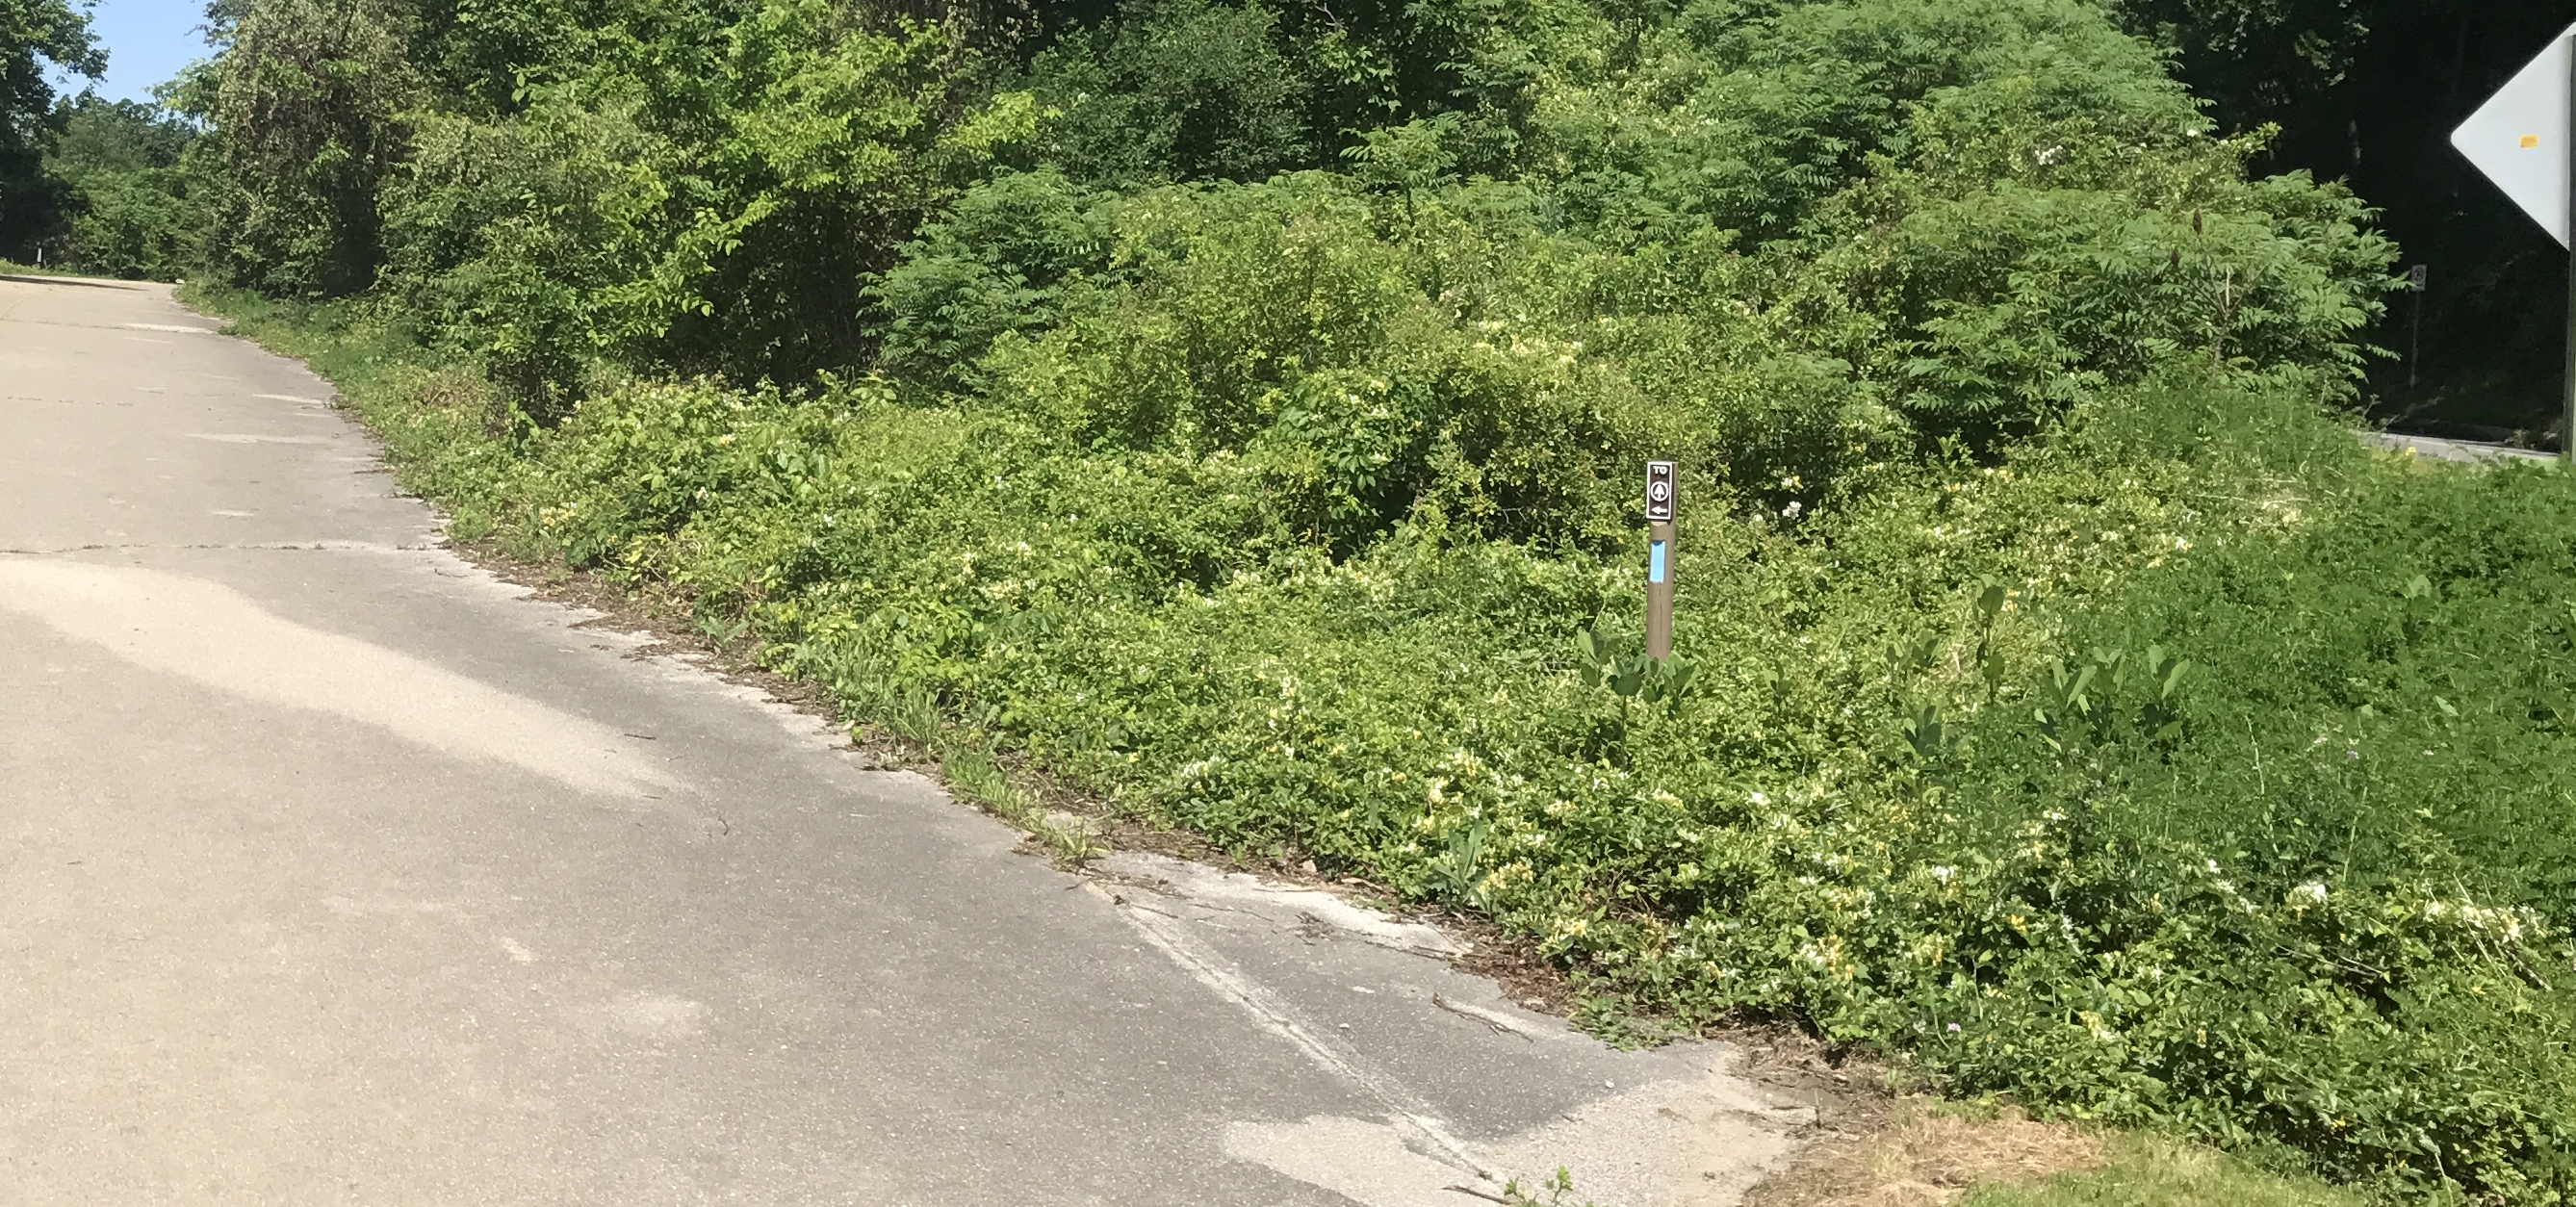
Years ago the AT simple went across US-40. But when the freeway was built, US-40 was shifted 100 feet north and part of old US-40 remains. To get to the AT here, hikers walk up 200 feet of old US-40, then turn left onto a trail for 200 feet.
Often though, folks get confused, especially those new to hiking and don’t understand that there is a little oddness to get to the AT. Many times they’ll wander, miss the blue marked trail and walk down the steep tick filled hill to get to the trail. In the first place this is a safety hazard. In the second place if becomes an erosion control problem.
I have made a number of improvements to stop short cutting down and up the embankment, yet those improvements were for those that knew where they were and trying to save time or avoid a wet trail.
The latest improvement here are some signs to direct those new to the area how to get to the AT. While there was a large sign directing folks to the AT at the parking area, once past it and on what had been US-40, folks forgot about it. So a new blue “blaze post” is installed with a ‘To AT’ directional sign pointing the way down old US-40 and this reinforces the existing blue blaze post at the trail head so when folks see the blue mark they now know what it’s for.
Appalachian Trail Blaze Post along I-70 Freeway in Maryland
Normally the Appalachian Trail is marked with 2″ x 6″ rectangular paint ‘blazes’ on trees every often enough so the trail is marked well.
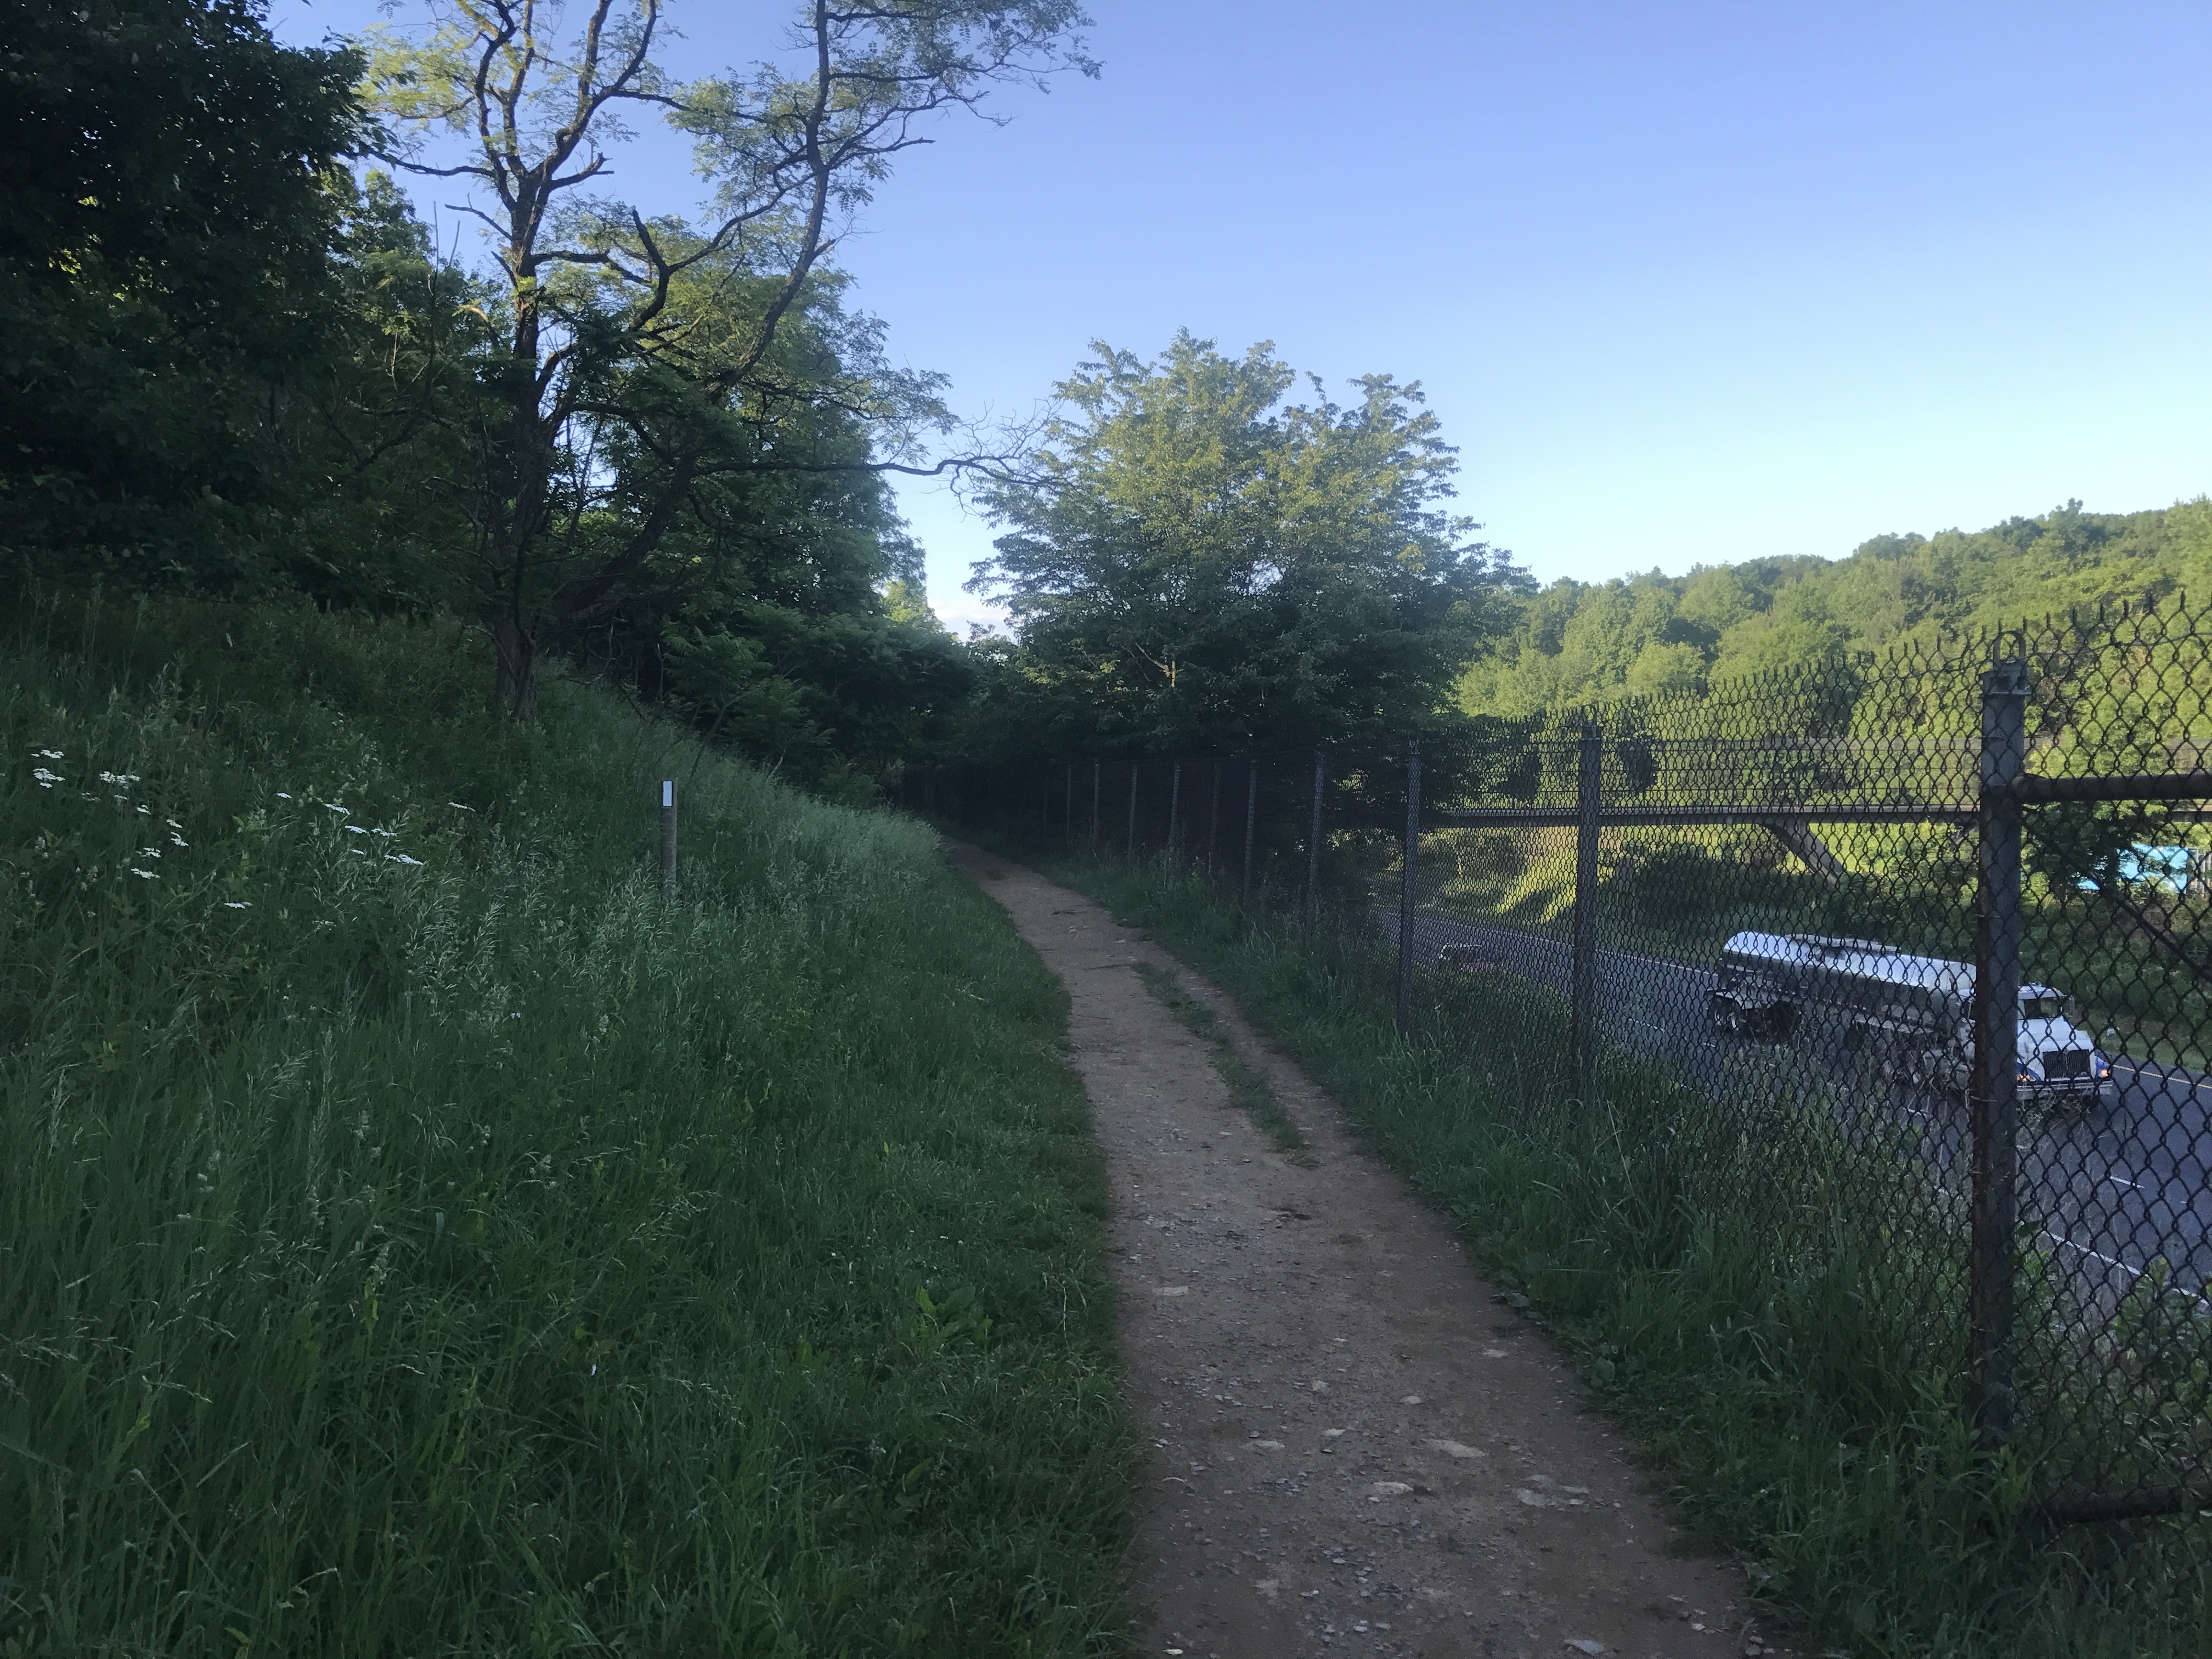
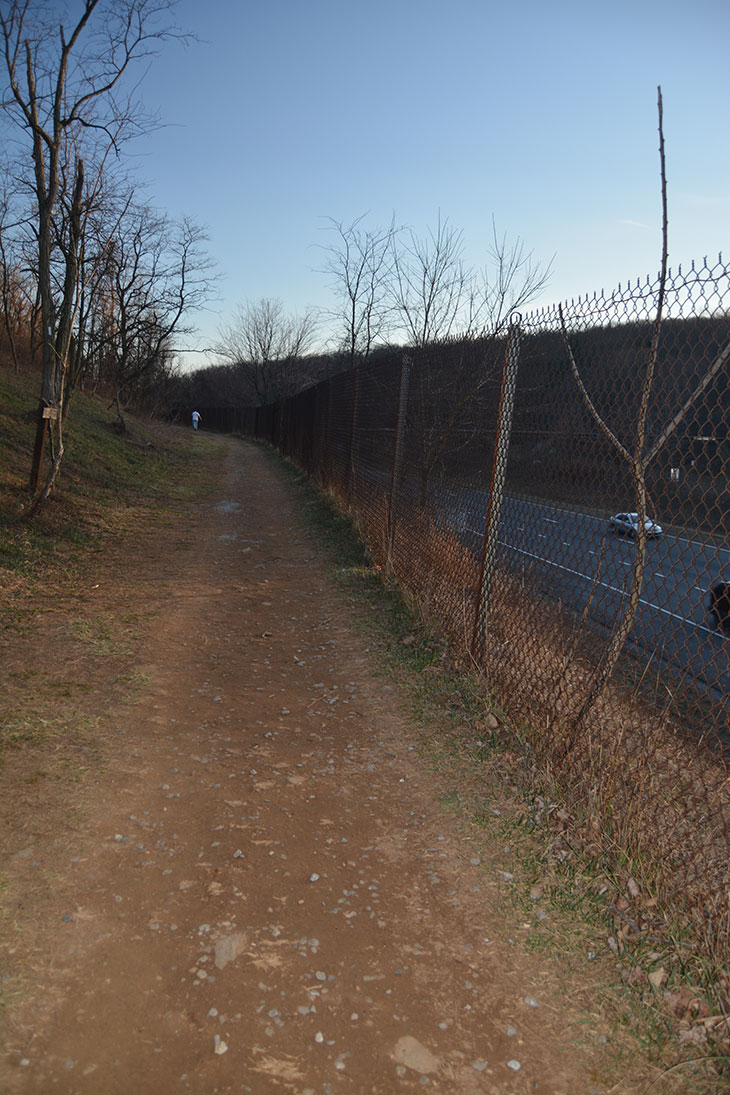
In some places though there is a lack of trees. The obvious places are crossing creeks and fields. Yet here along the I-70 in Maryland, the AT follows the freeway for 1/4 mile. On one side is a chain link safety fence. On the other is a steep hill from the cut made for the freeway through South Mountain to reduce the grade of the roadway.
So there is a serious lack of proper trees here and it’s an unusual place. Hikers cross the I-70 Freeway on a dedicated footbridge. Northbound hikers meet a junction with the blue marked trail (which 50 years ago was the AT) and the staggered white blazes are ambiguous. I did manage to find a tree in close proximately of the bridge to blaze. But a second one is important at such a turn and the only trees were really too far off the AT to have the blaze reliably seen.
Si after thinking of other solutions including using the fence in some manner I decided the easiest solution was adding a ‘blaze post’ here to mark the trail. I thought it wouldn’t be too hard to dig the required 18″ deep post hold. But was I wrong and I’m used to digging in rock mountain ground. Yet, from what must be some result of building the I-70 Freeway, there is a consistent almost concrete like layer exactly 12″ below the soil in every direction. So my 1/2 install of the post turned into a 2 hour event.
In the end is a nicely visible blaze in both directions.
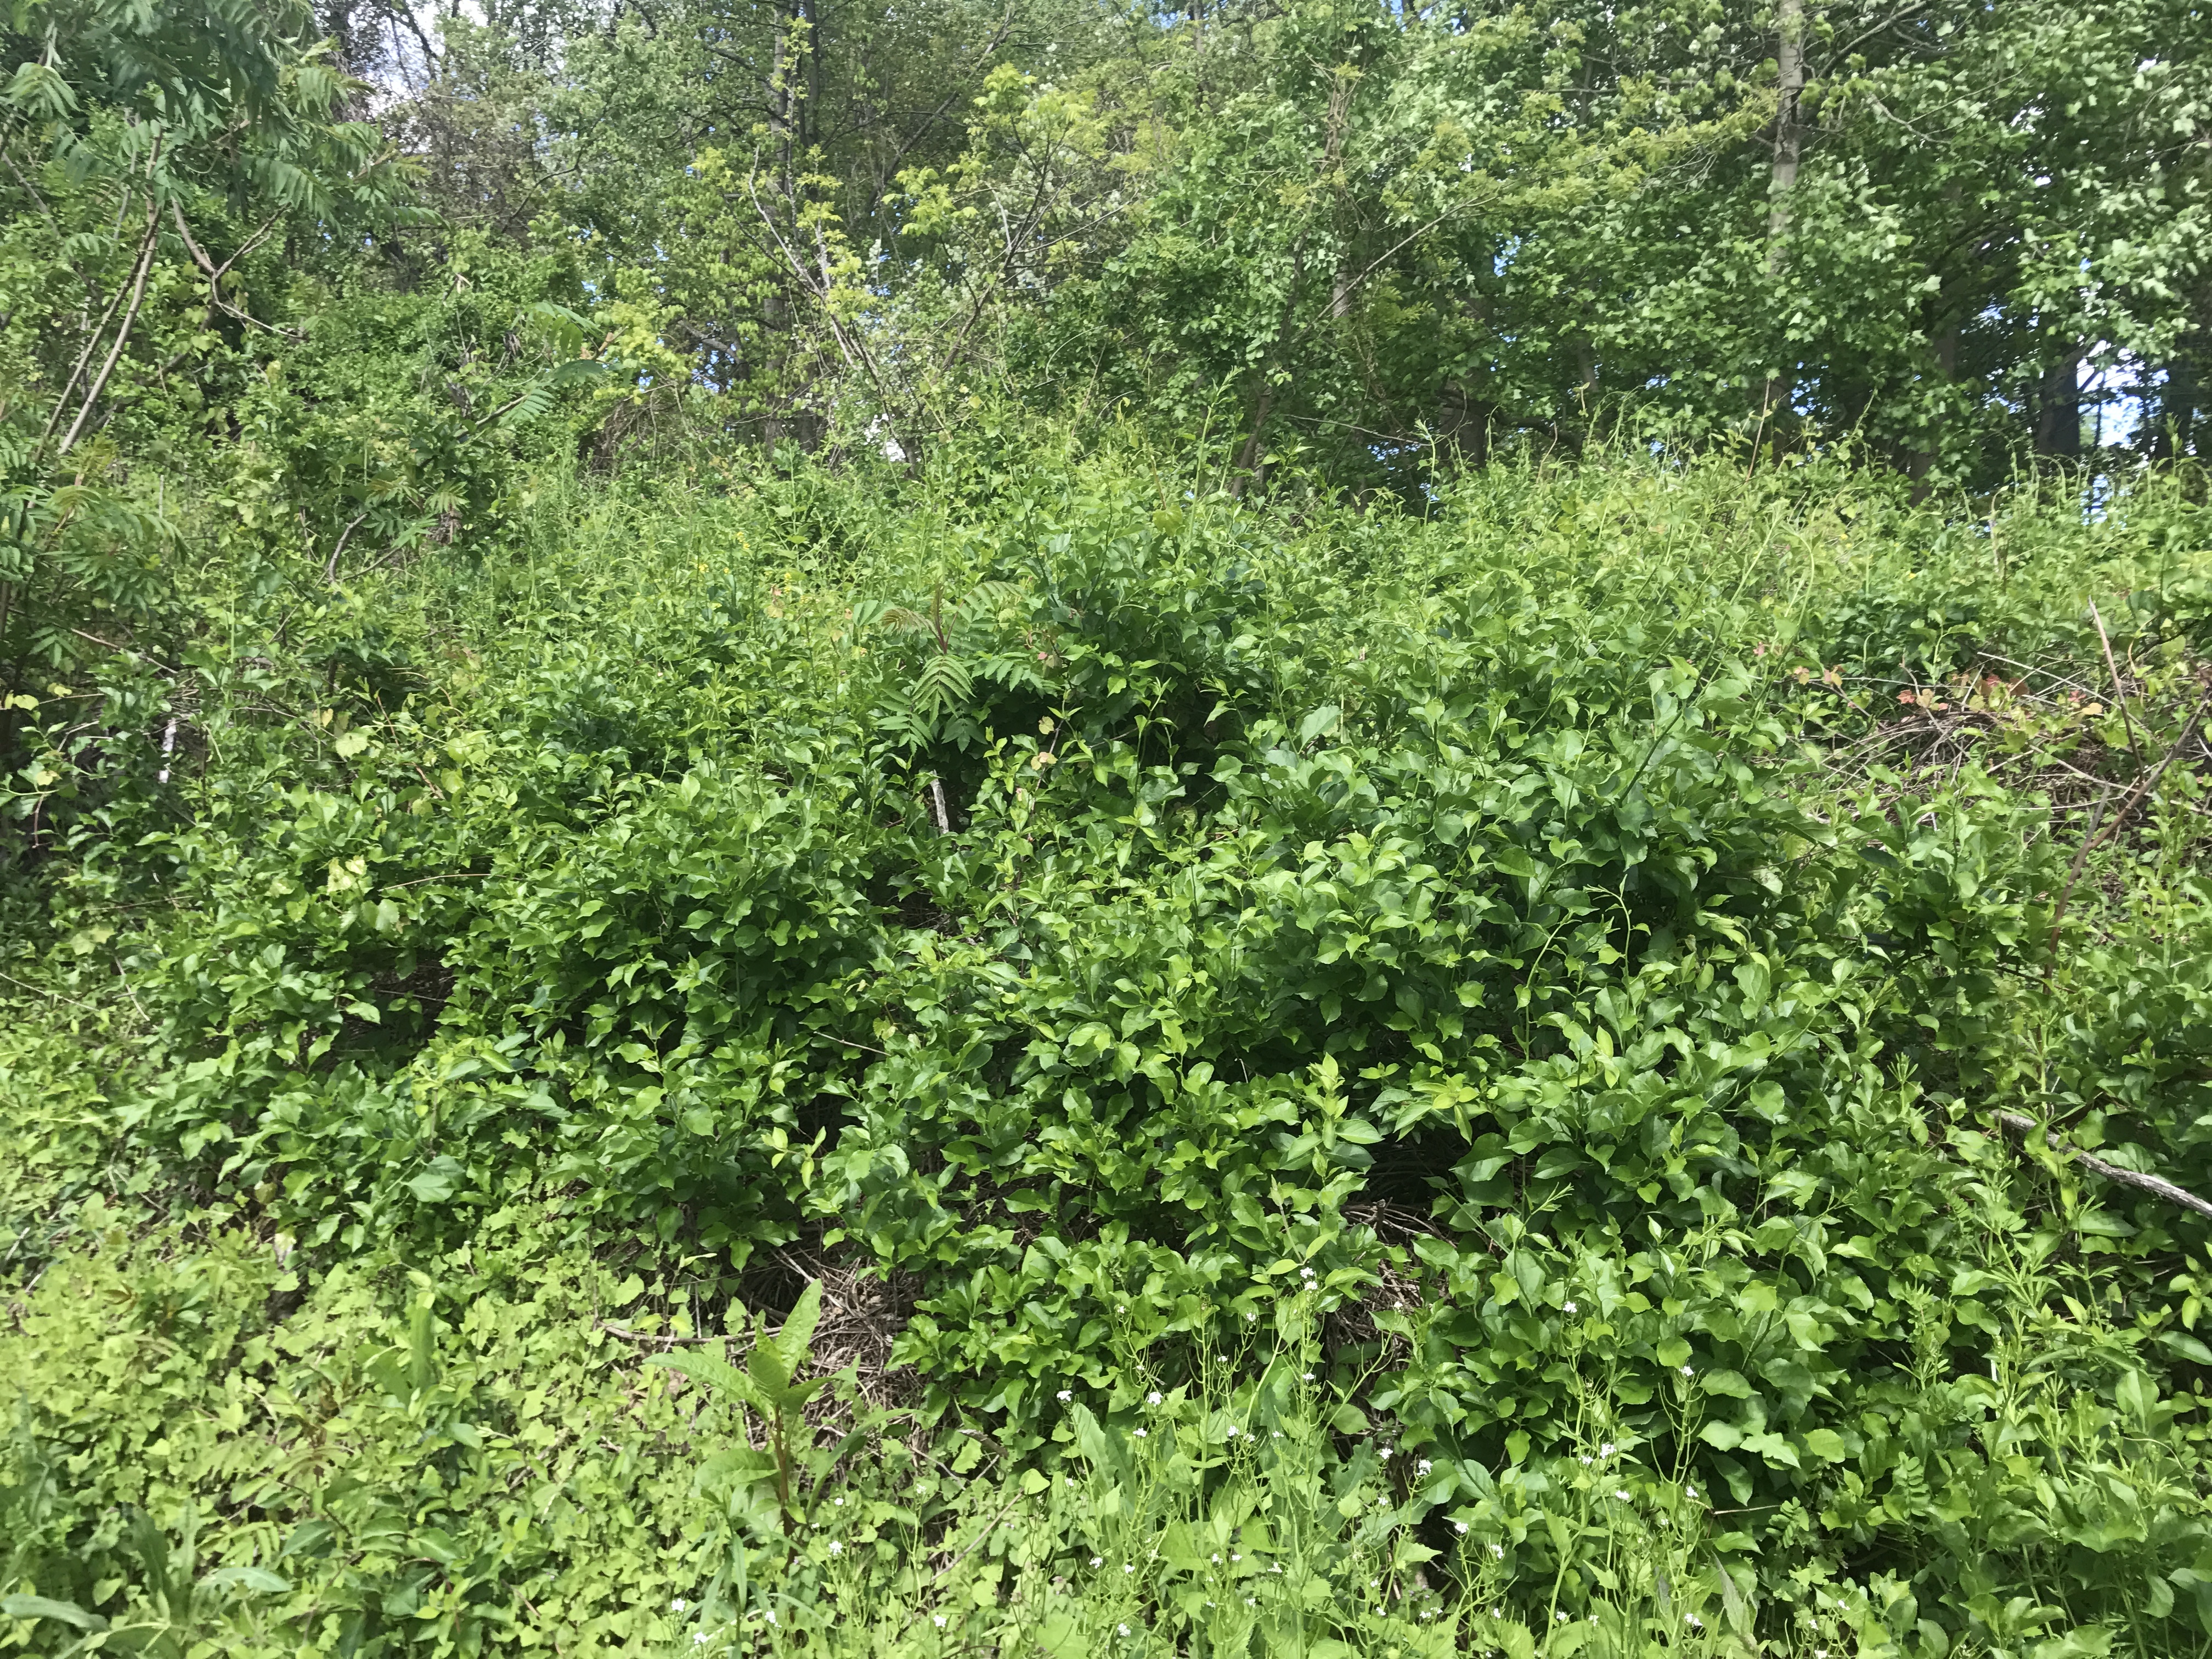
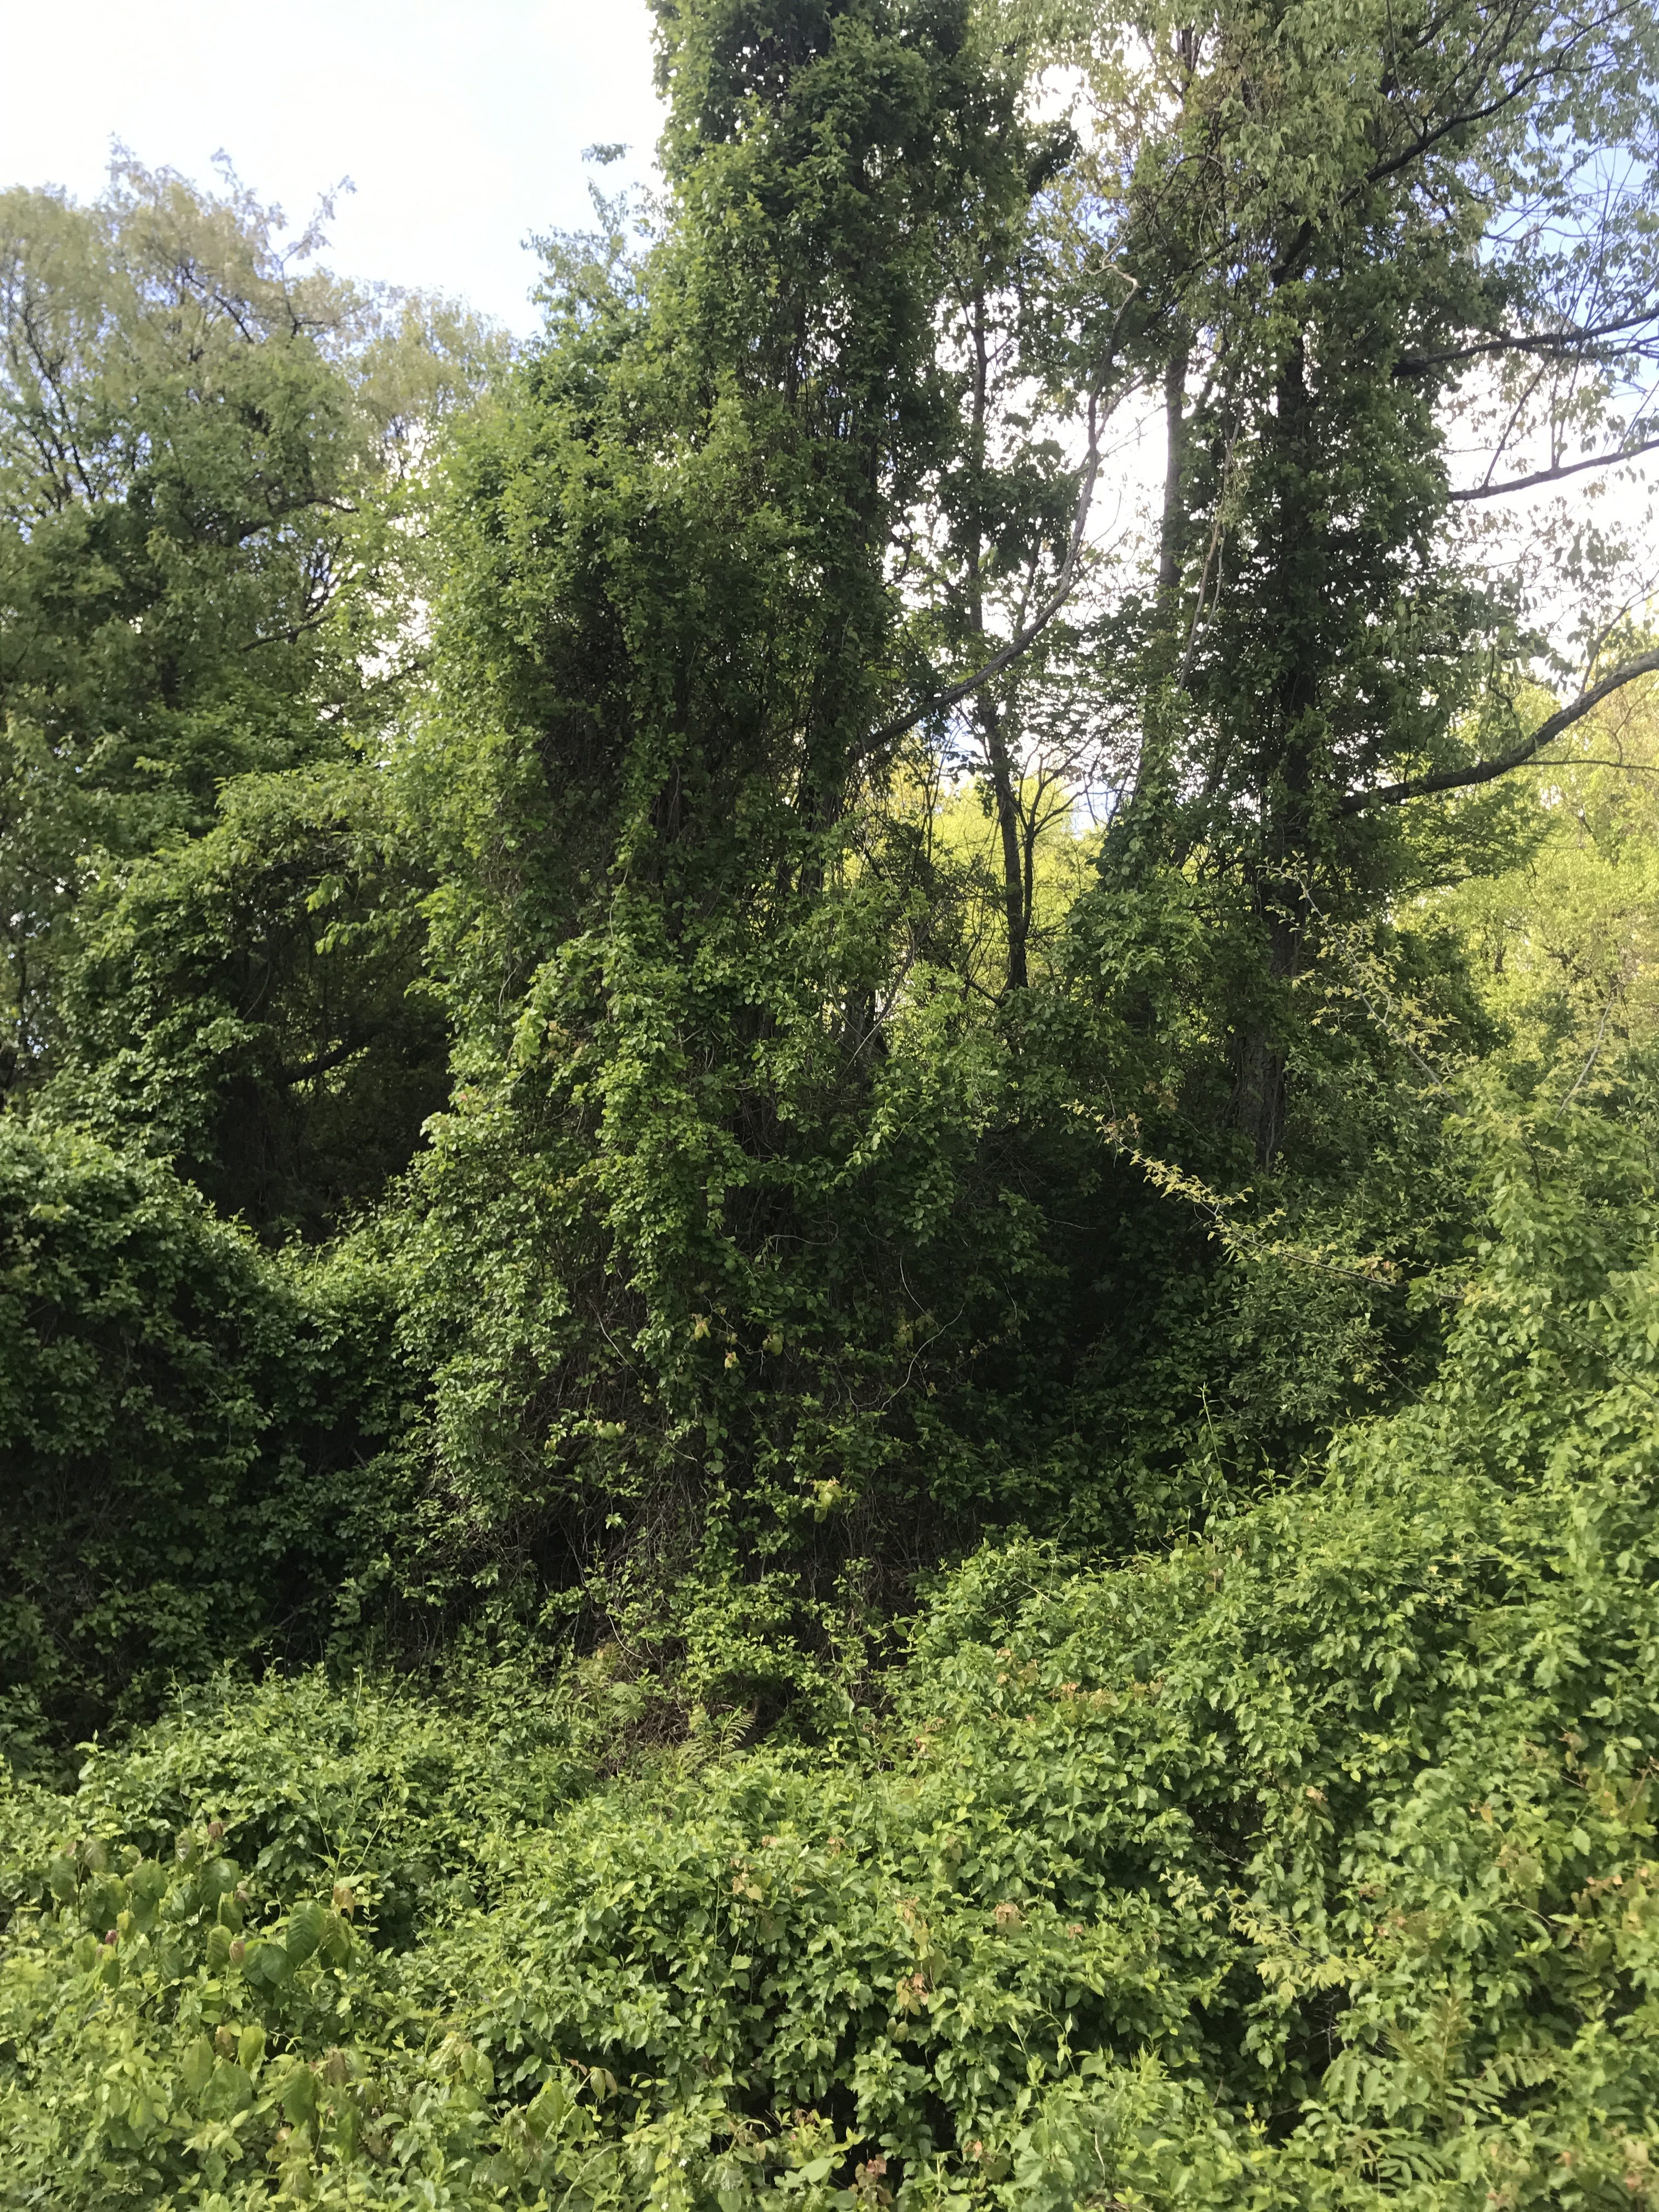
Oriental Bittersweet pictured above along the I-70 Freeway in Maryland.
Oriental Bittersweet is an invasive vine that is a native of East Asia. It grows very well here in Maryland. So well that it will grow to the top of a 50 foot tall tree, strangle it (hide the tree from daylight) which eventuall will kill the tree. The tree will then fall and become a blowdown to clean up. Or get left there.
The trouble with leaving the blowdown there is the bittersweet will grow over the downed tree and look like a hedge. Meanwhile it’s secretly planning an attack on nearby tree spreading 50 to 80 feet at a time in this manner.
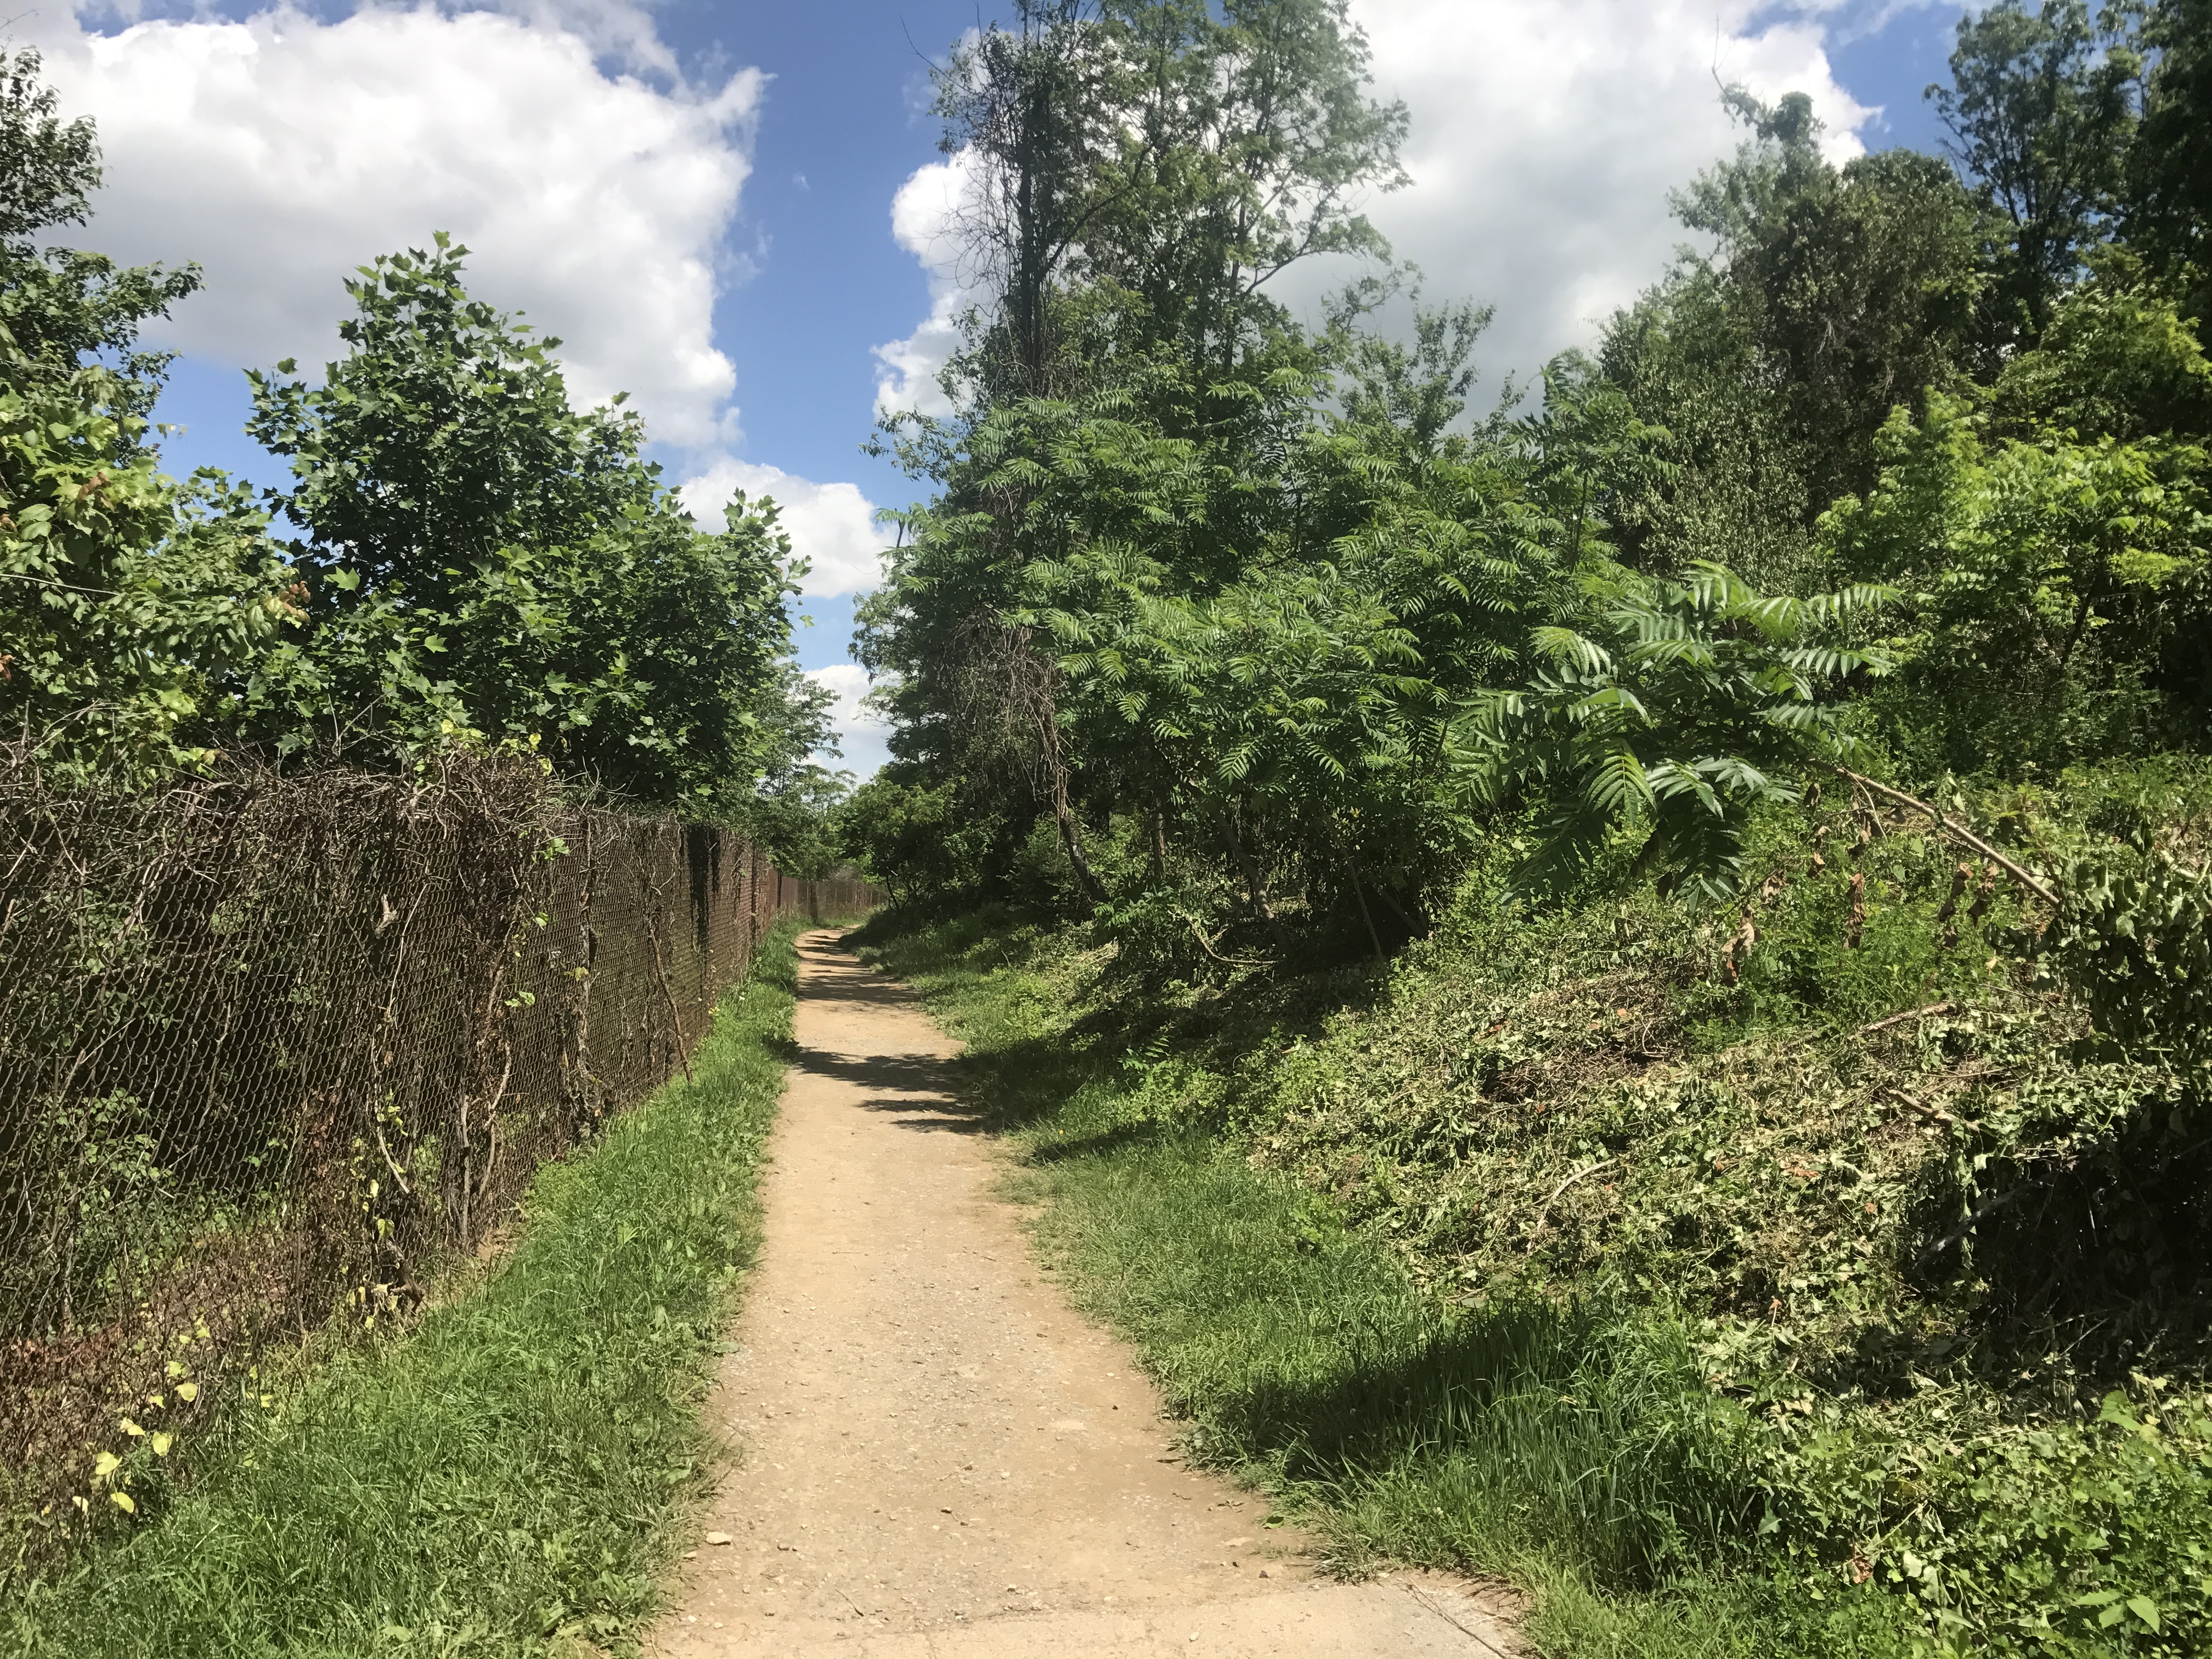
I’ve been working controlling Oriental Bitterswwet at the Appalachian Trail Trailhead and along the Appalachian Trail as it crosses the power line clearing near US-40 in Maryland. There is really quite a lot of bittersweet here. Acres and acres of it in fact. I’m tackling the area near the trail where the fallen trees will cause work and hazards.
I use a Stihl Hedge Trimmer to chop the vines up and the result is pretty impressive. It does take a lot of time. I’m going to keep on this stuff and keep cutting it so it eventually will die from many of cuts. Then when controlled native vegetation will return while continual prevention of new bittersweet plants sprouting here. It will be a permanent task.
Oriental Bittersweet Controlled on AT
Here is a picture of Oriental Bittersweet out of control at the US-40 AT Trail Head. Much of this are is already been worked on but I didn’t take pictures yet.
Oriental Bittersweet Growing Over Trees on Appalachian Trail in Maryland
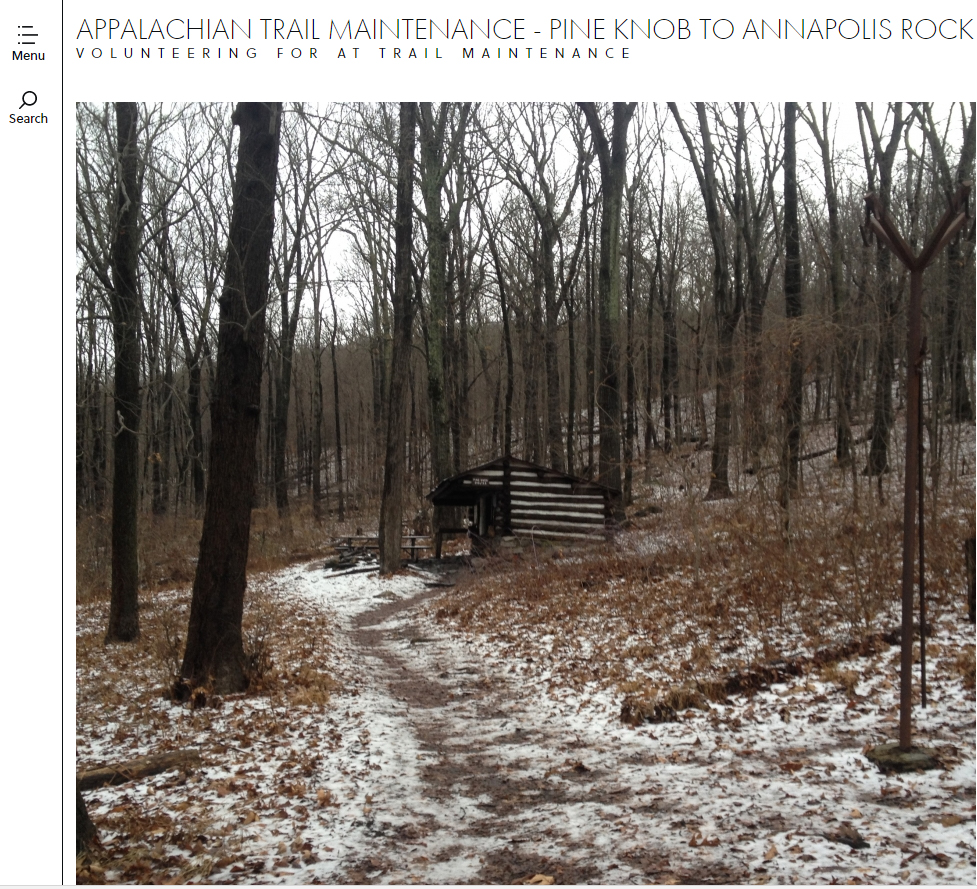
Capture of atpineknob.com showing home page (Pine Knob Shelter in photo)
Over the last year that I’ve been working here on the AT between Pine Knob and Annapolis Rock, there have been lots of folks have been inquiring about how to help out. In the past I’ve handed out cards with contact information for the South Mountaineers Trail Crew (which can be found on the PATC Website – see link below). Yesterday though, I decided to set up a volunteer organization website to build up a group of interested folks and have a way to communicate work events and schedules. So wander over there if you want to help out and Volunteer on the Appalachian Trail at Annapolis Rock.
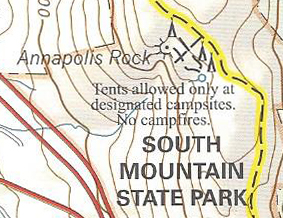
The site is named atpineknob.com, and I choose that because Annapolis Rock is a little ambiguous. The official name is ‘Annapolis Rock’ without an S as seen on the cropped map image below. Yet the name is written all of the time as Annapolis Rocks, so I choose Pine Knob instead since the name is pretty straight forward. Pine Knob is the name of the hill you climb as you walk from the trail head toward Annapolis Rock and is where a lot of effort is required because of the slope there.
Map Clip of PATC Map – Annapolis Rock
So please visit our Maryland AT Volunteering Website and join us. It’s a work in progress and much more content will be there soon.
Other volunteer opportunities exist including the South Mountaineers – now in it’s 25th year. Visit the PATC Website and choose newsletters for the schedule for the South Mountainers Trail Crew.
The stone has almost vanished after a month and only 1 real rain. Should be out of sight soon as it rained again yesterday and more is supposed to come in a couple days. 42 bags of gravel, 50 lbs each gone. But not really. The stone adds support to the base and should keep things from becoming a sloppy mess making people walk other pathways that are not desirable for us AT maintainers.
Update: 2017 June: This really worked well. The stone pushed in and is firm. Water from all the rain lately has run off and only a few places had standing water.
Applachian Trail Along I-70 After a Month Stone Mostly Pushed Into Trail Tread (Feb 2017)
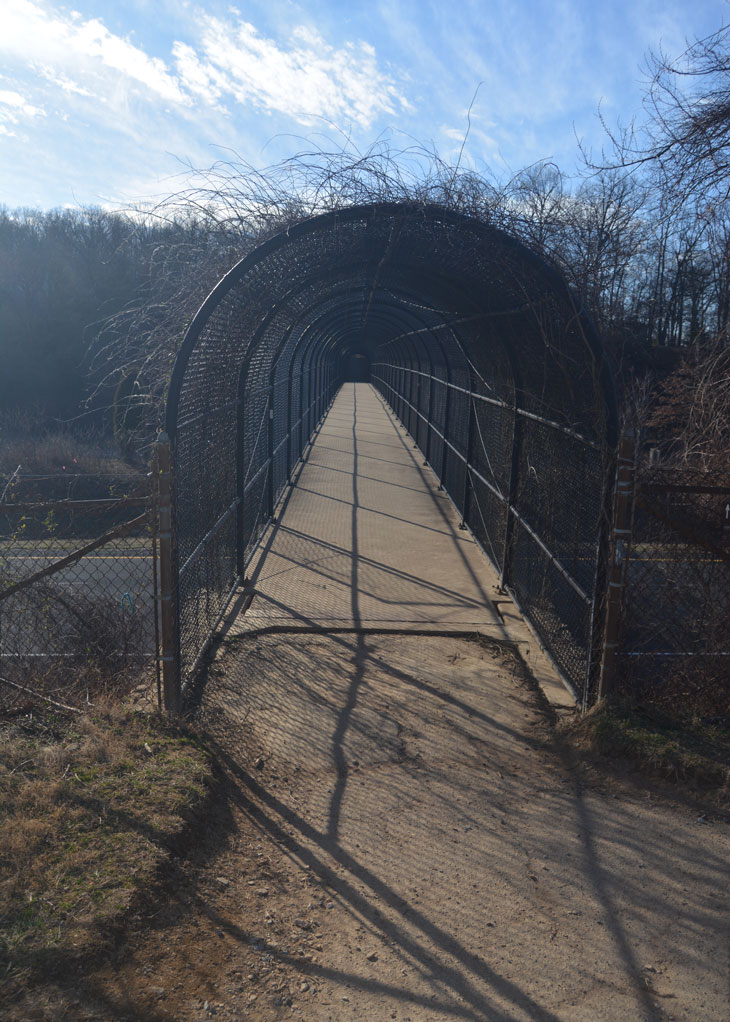
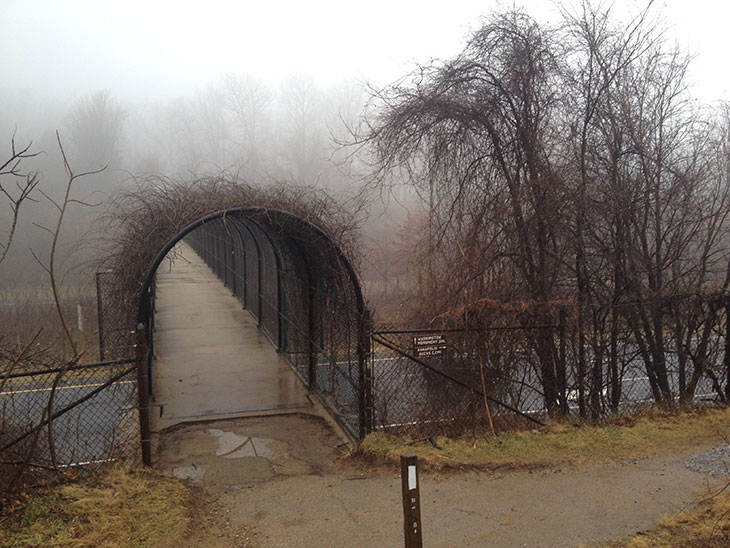
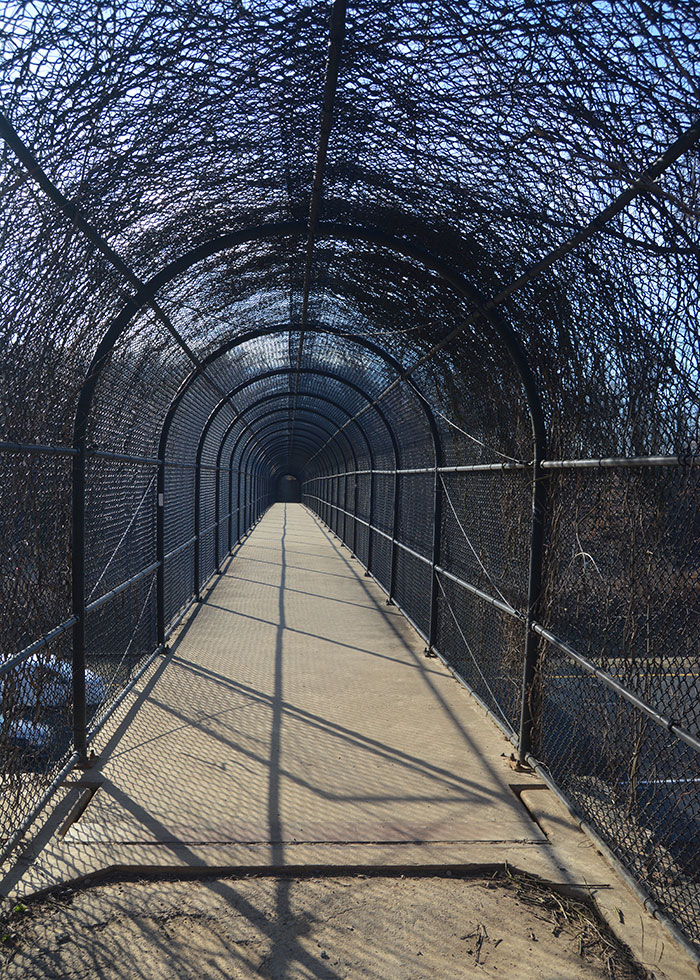
This footbridge is often the first thing someone sees when they arrive at the Appalachian Trail (AT) in Maryland for the first time. This location nears Myersville, MD is close to the I-70 Freeway so has access, close to a popular park so has attention and has a scenic overlook at Annapolis Rock within a reasonable 1 hour one way walk with moderate difficulty.
Lots of folks walking on the Appalachian Trail have their picture taken here. Seems to me that’s not really what the Appalachian Trail is about and there ought to be something that is a better background then the bridge.
But if you get here at the right time, ignore the Appalachian Trail part, it does make an interesting picture.
Appalachian Trail Foot Bridge I-70 Freeway in Maryland
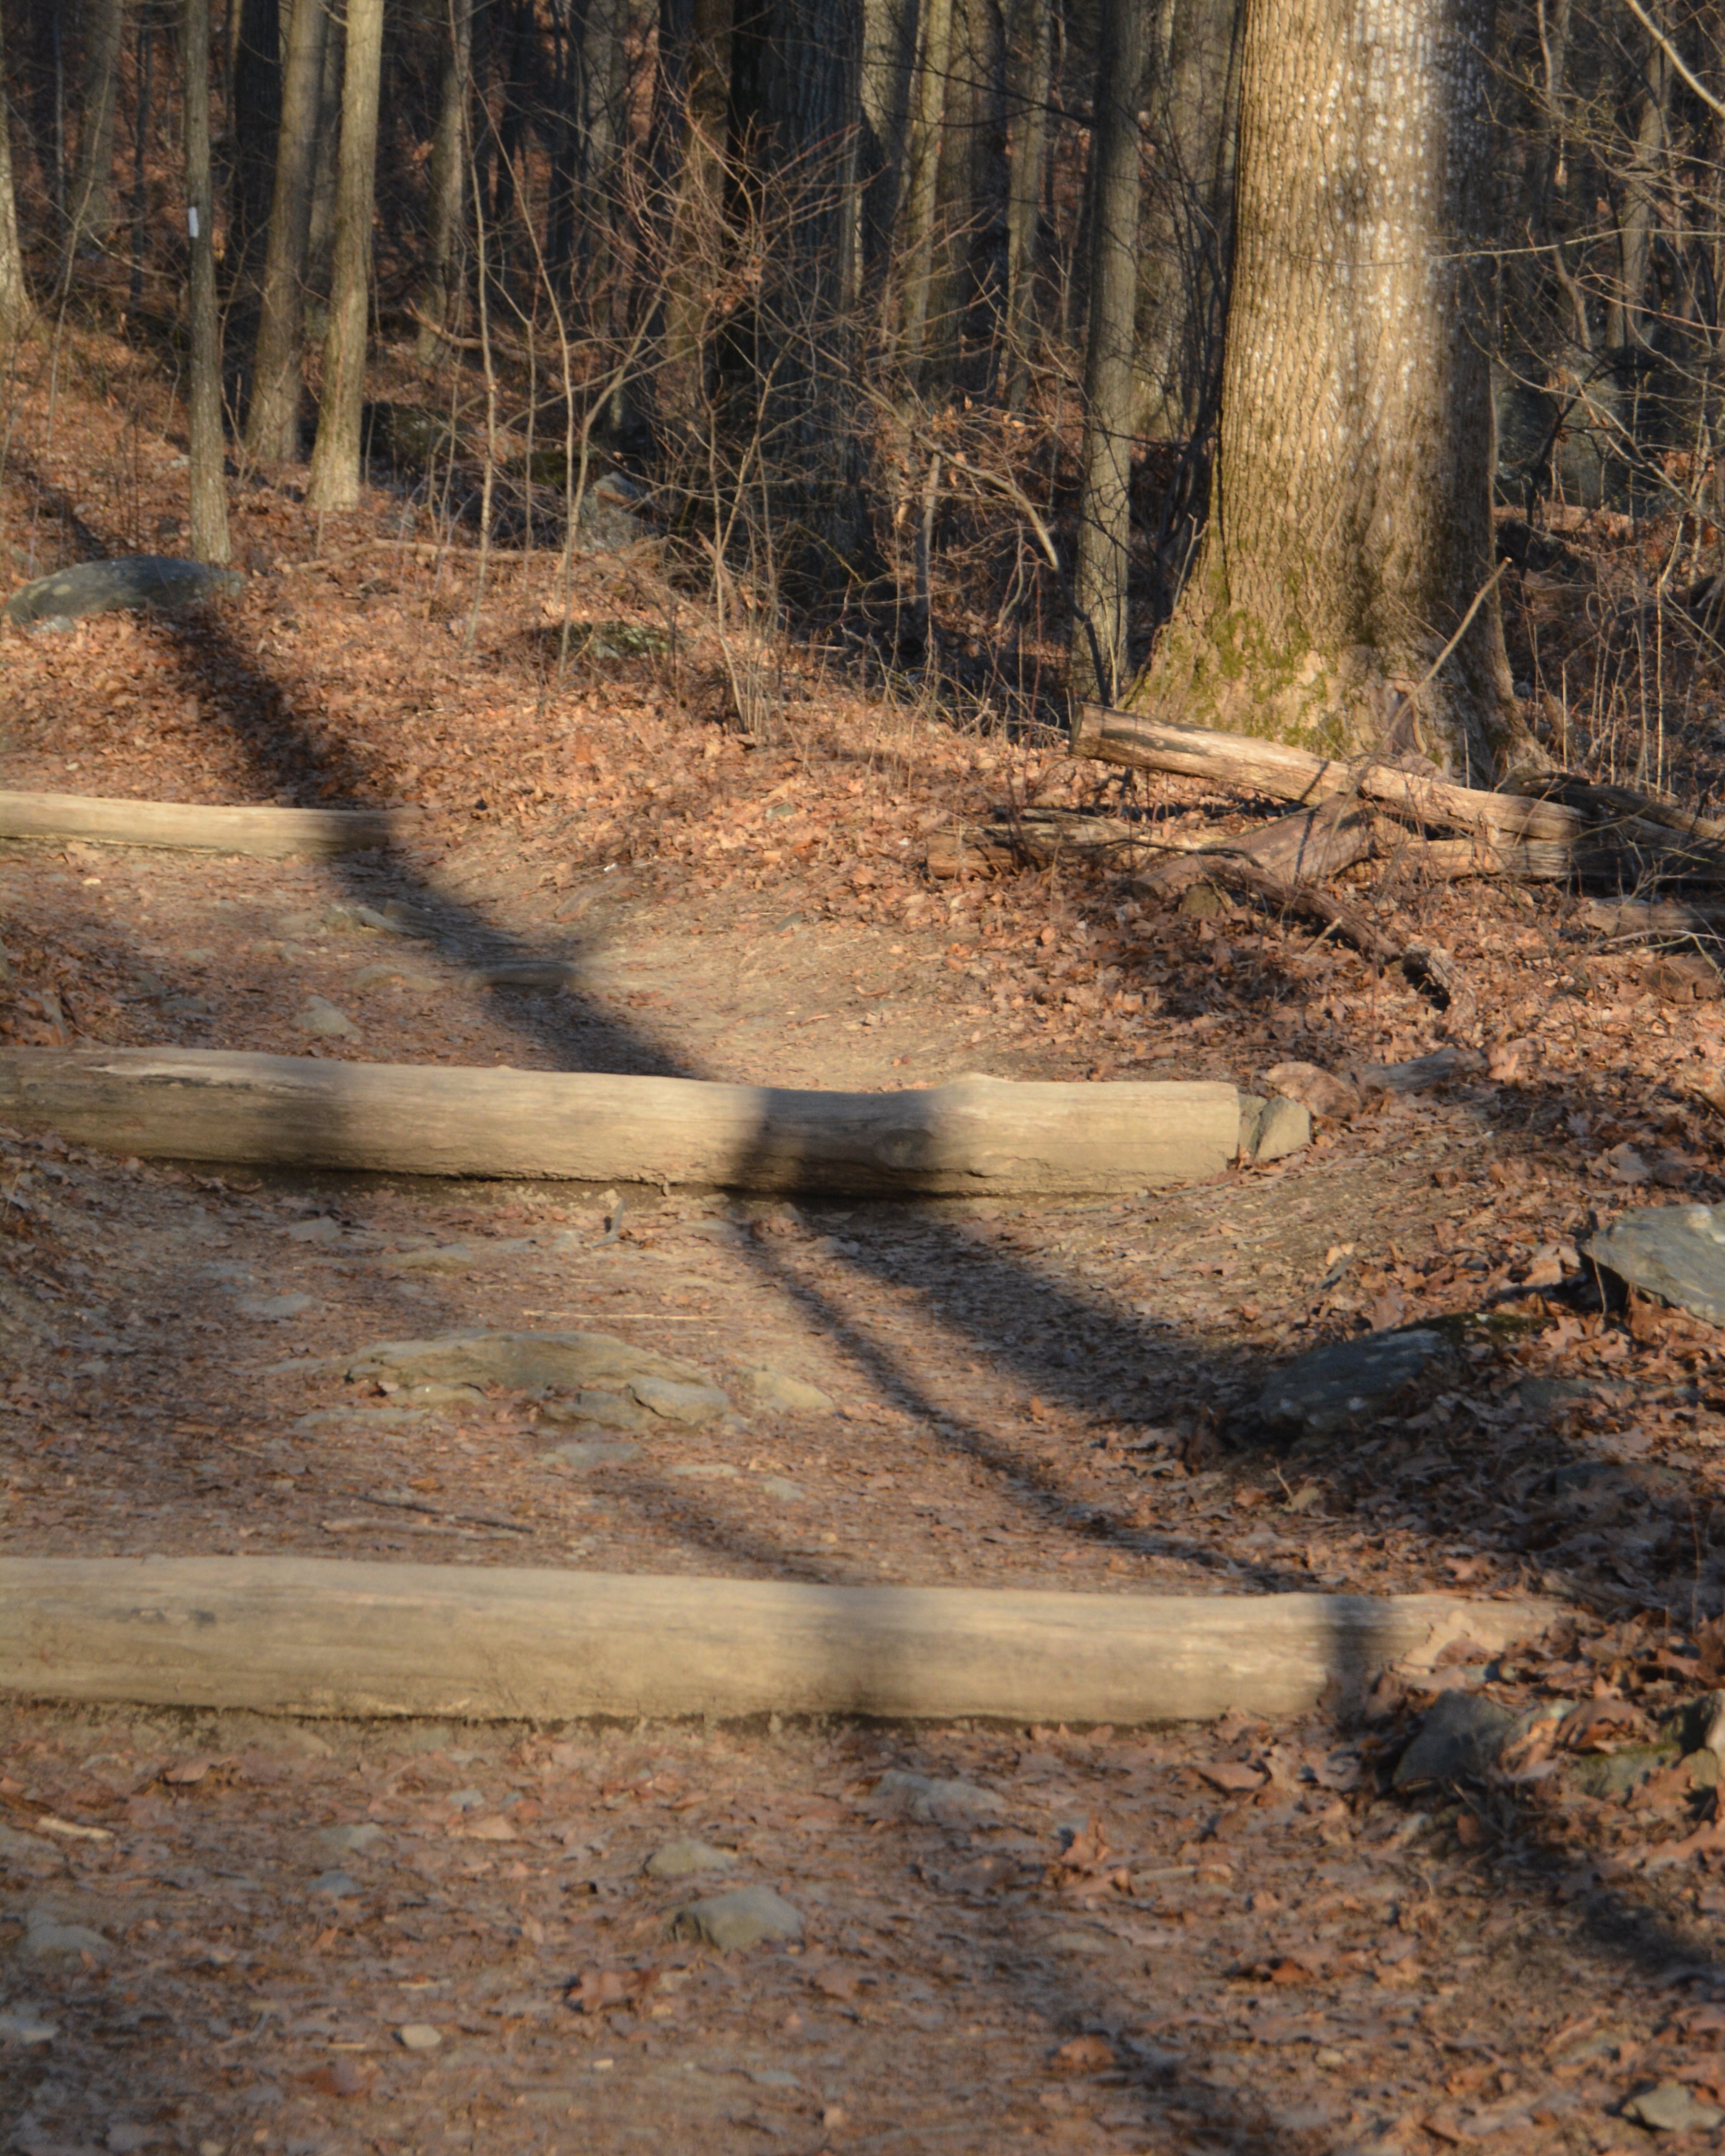
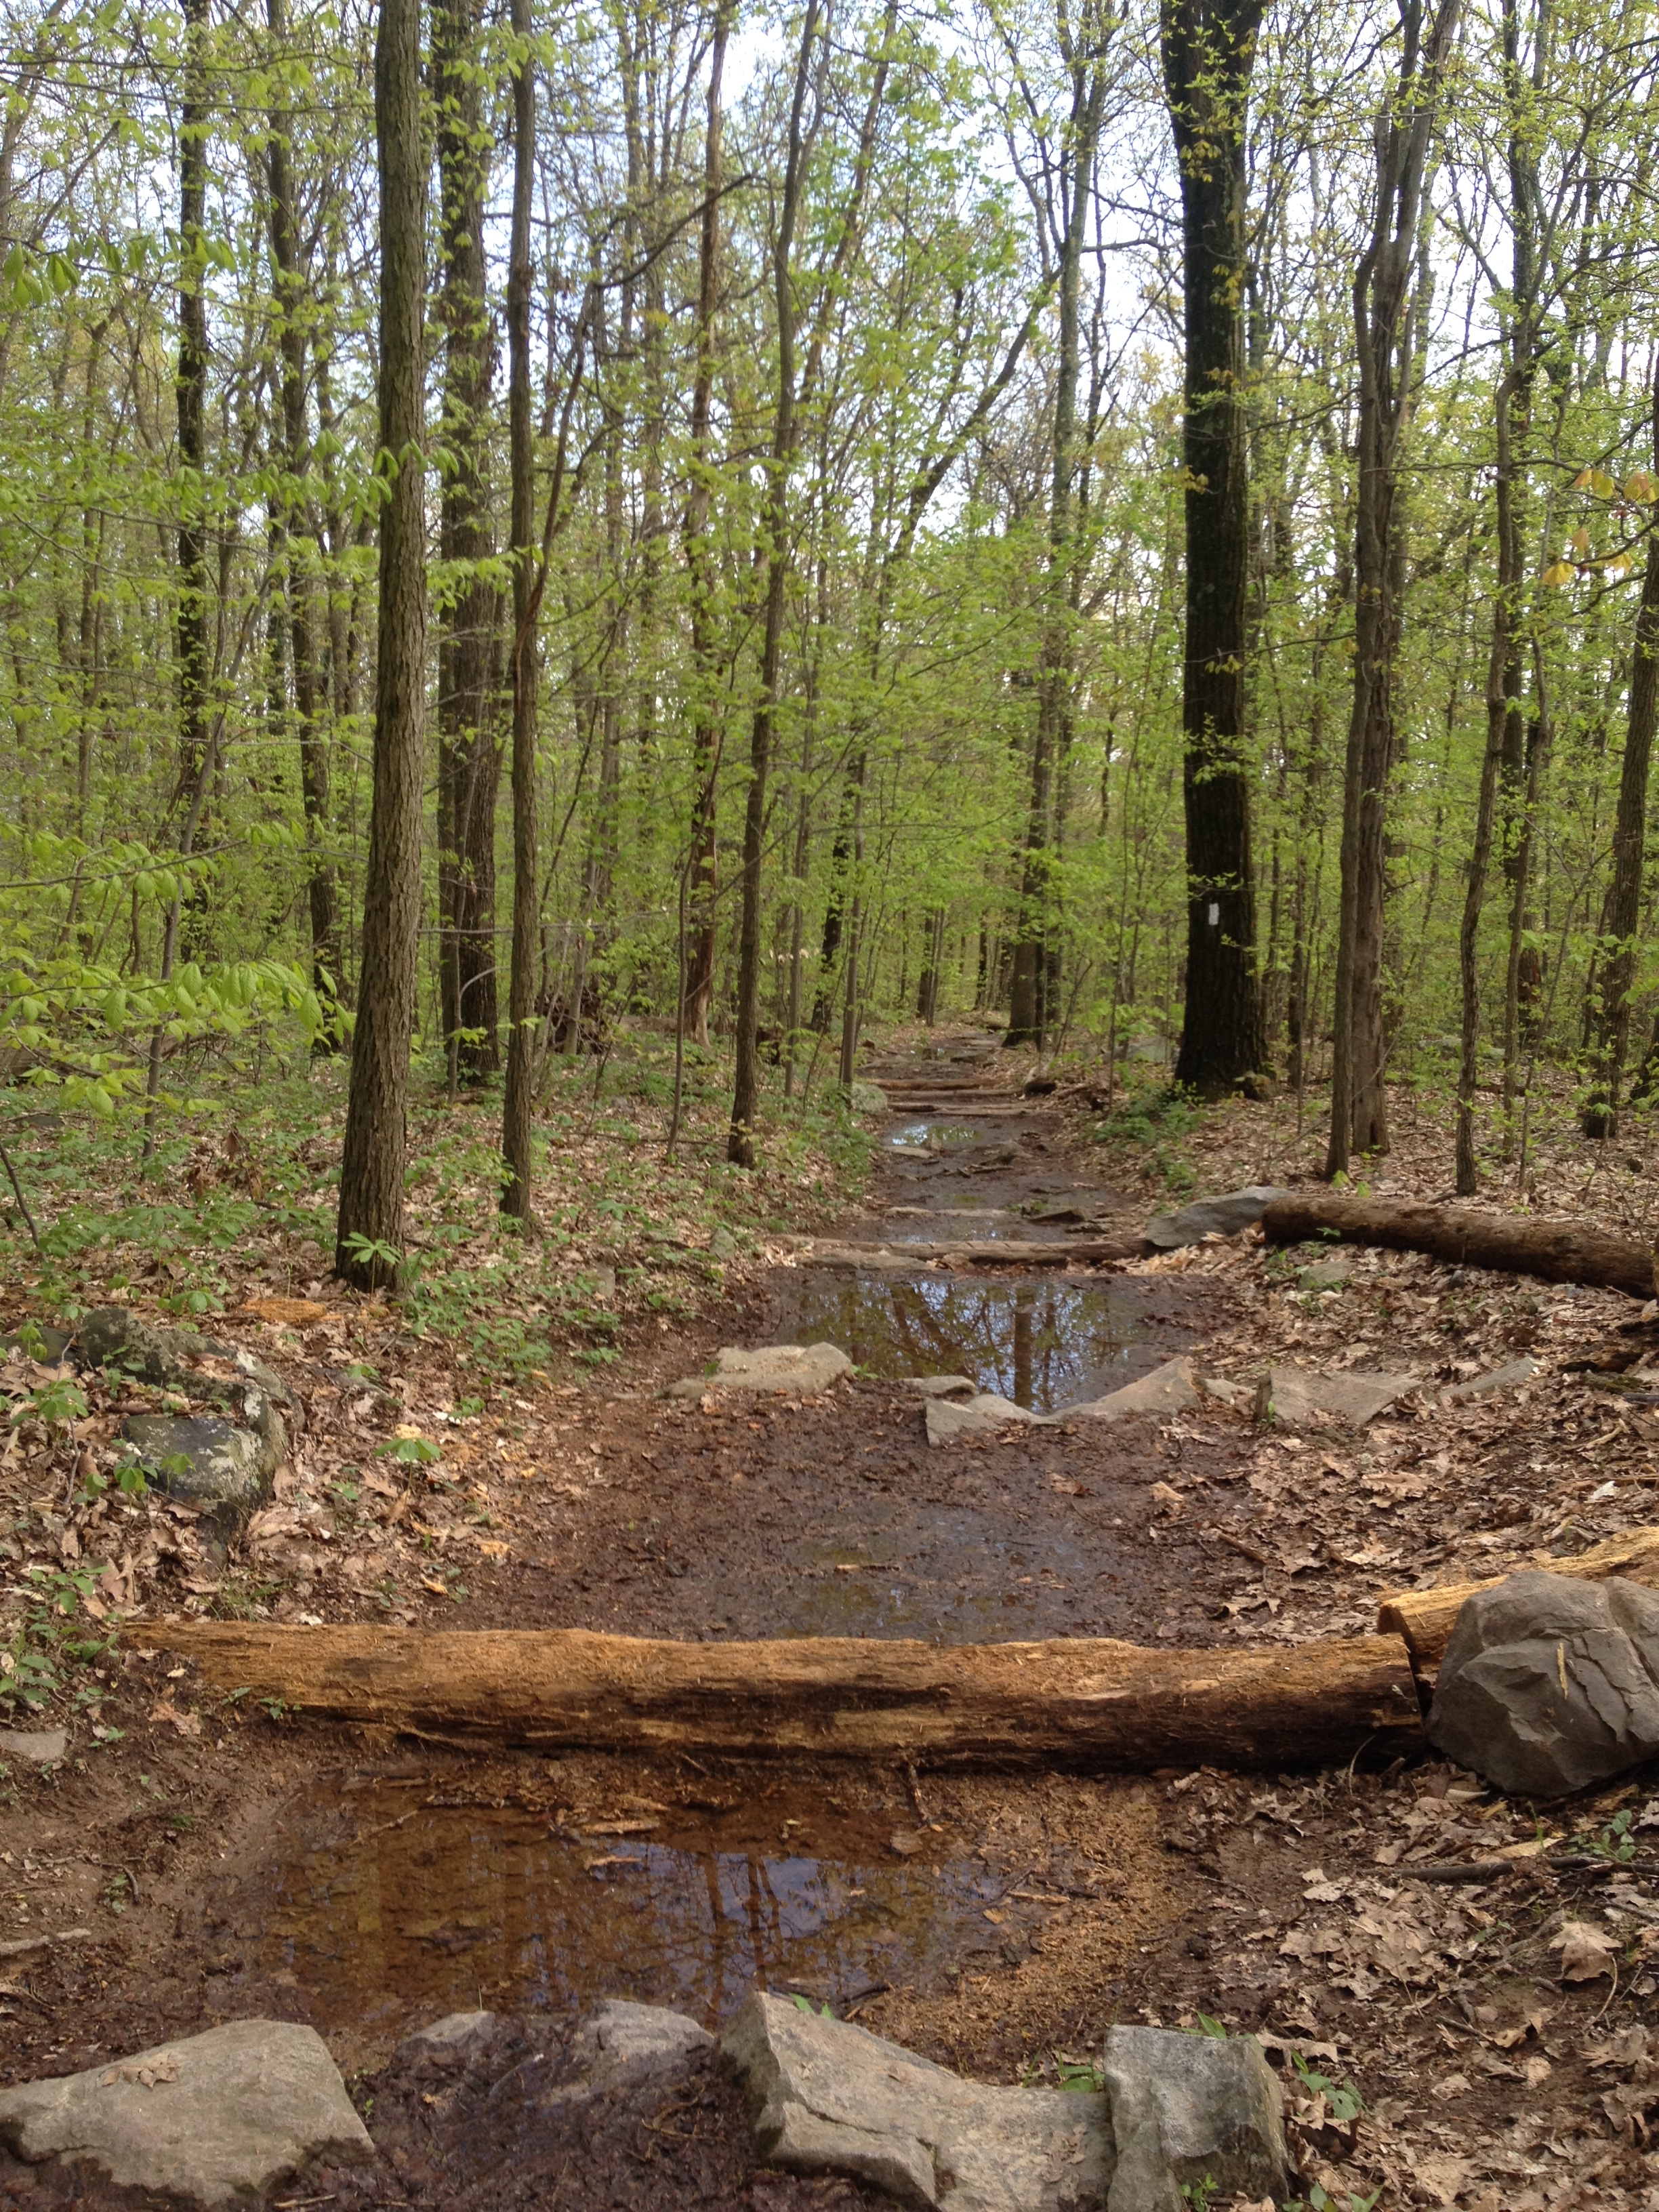
Checkdams are obstructions placed on the Appalachian Trail which hold back the silt that would otherwise erode away and be lost forever. Often hikers believe these are steps but their function is to be a dam and hold back dirt that would otherwise wash away. When used properly and over decades, checkdams can be used to rejuvenate a section of trail that is rutted. More often checkdams are simply used to slow the progression of erosion because the soil building up is coming from an uphill section of the trail so another section is loosing it’s soil in order to fill the dam.
Checkdams on the AT are generally either made of stone or logs. Stone is permanent and are a lot of work to construct but that work is only done once. Laying a log across the AT seems easy but the log only lasts a couple years and must be replaced timely or the effort is futile. So making stone checkdams is better but more time consuming and logs seem easier at the time but may actually be more work in the long term.
The checkdams work by slowing the flow of water which is carrying silt so that the silt (dirt) deposits behind the dam. The water then continues to flow on downhill or seeps into the ground. The buildup of the silt behind checkdams takes time and is only going to collect behind one checkdam so this is a long term, time consuming process that requires commitment. Once one dam fills another can be added and maintainers must watch the older dams for decay replacing any logs that are rotten before they fail completely.
One Checkdam at a Time or A Stitch in Time Saves Nine
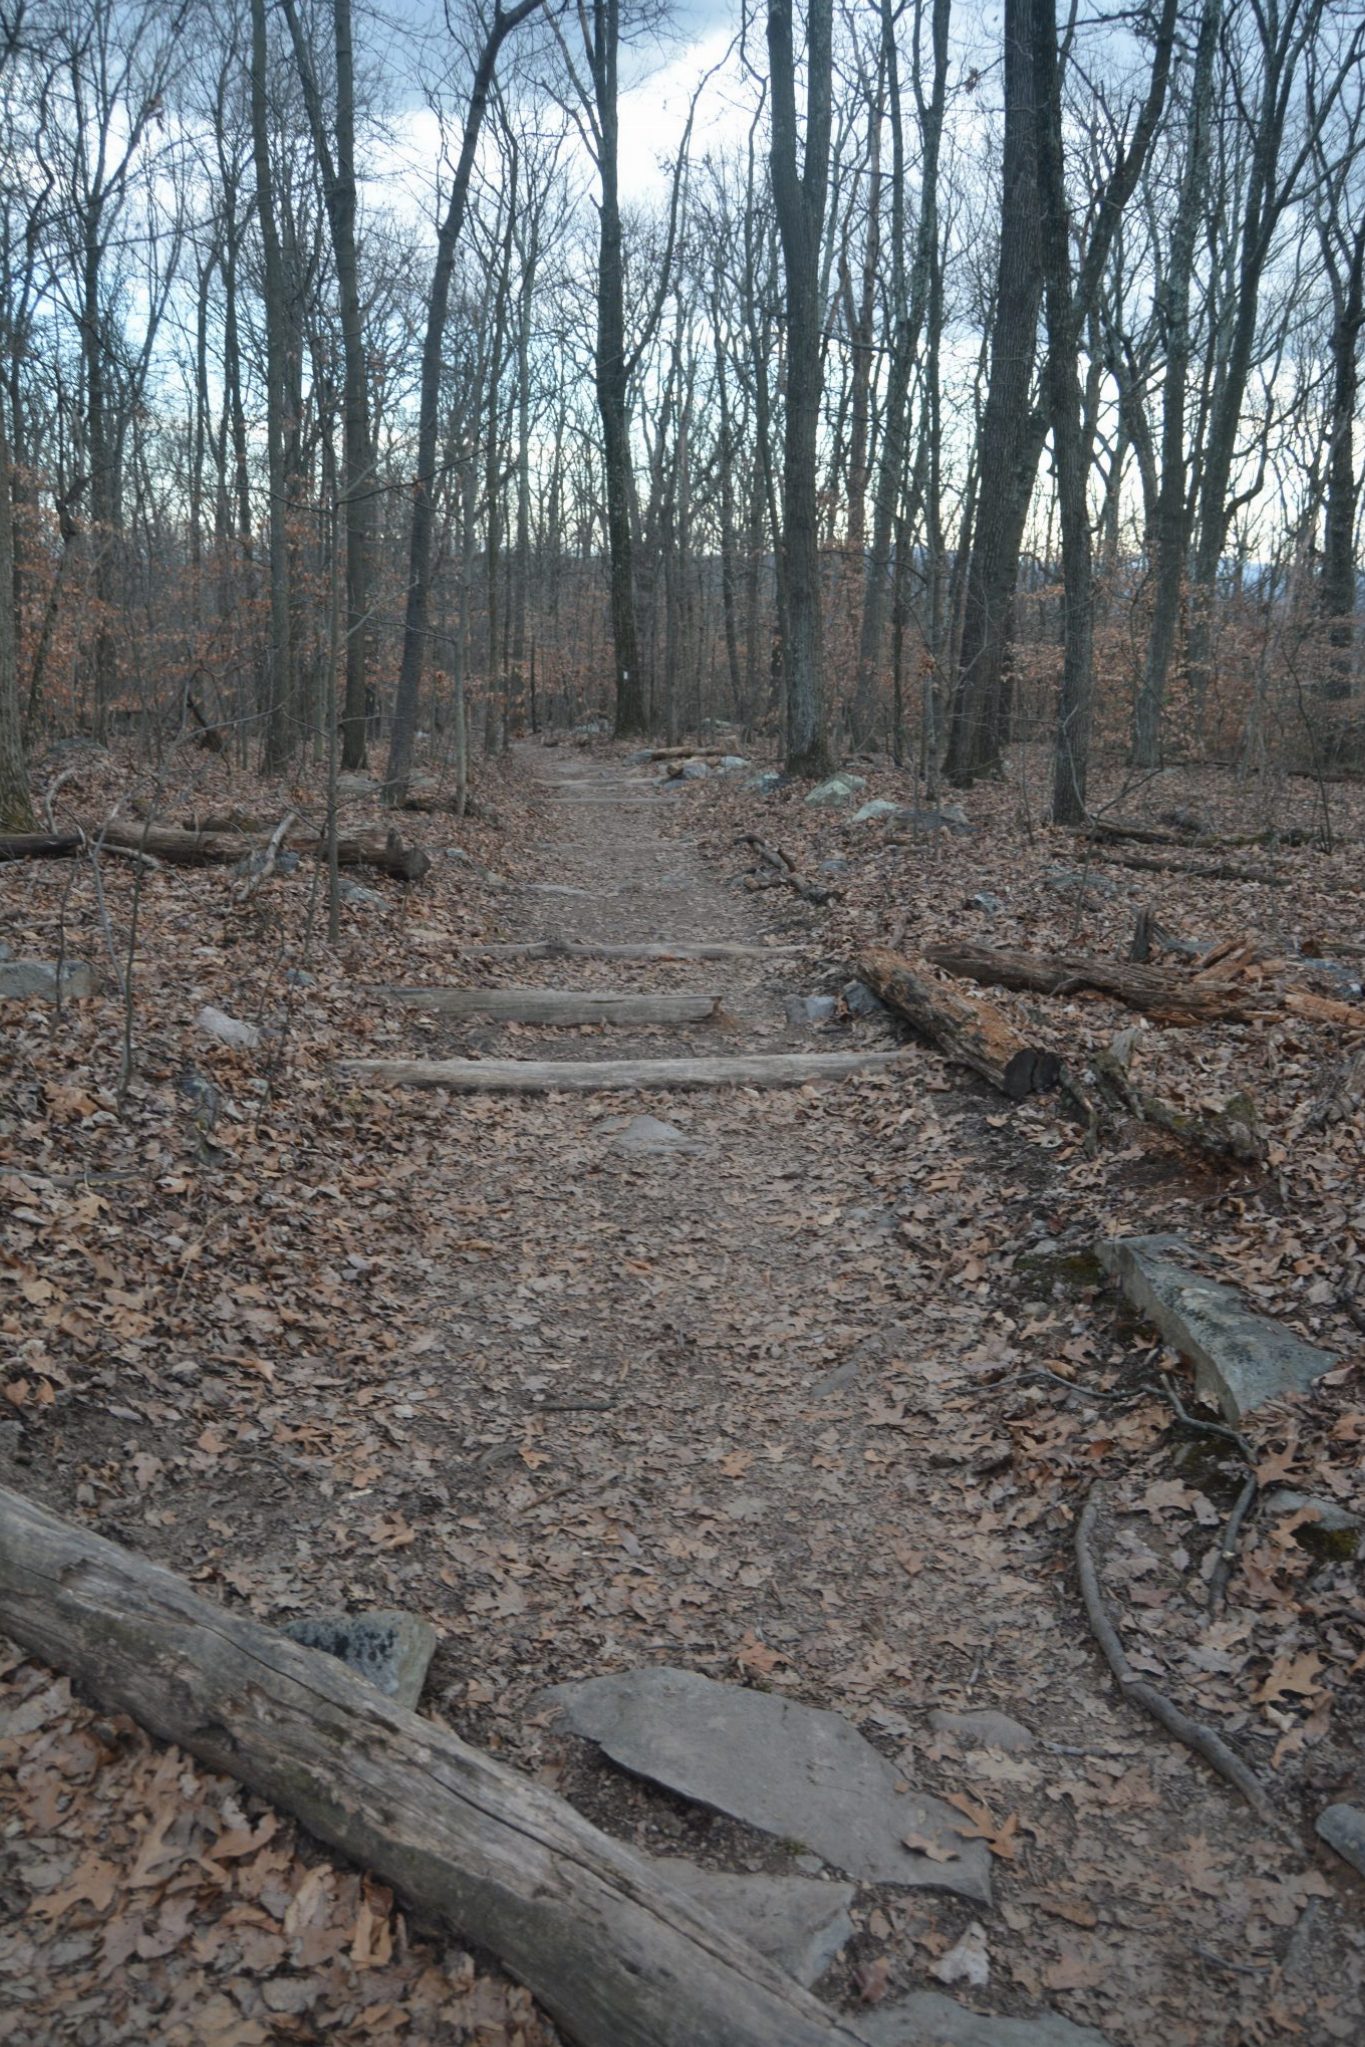
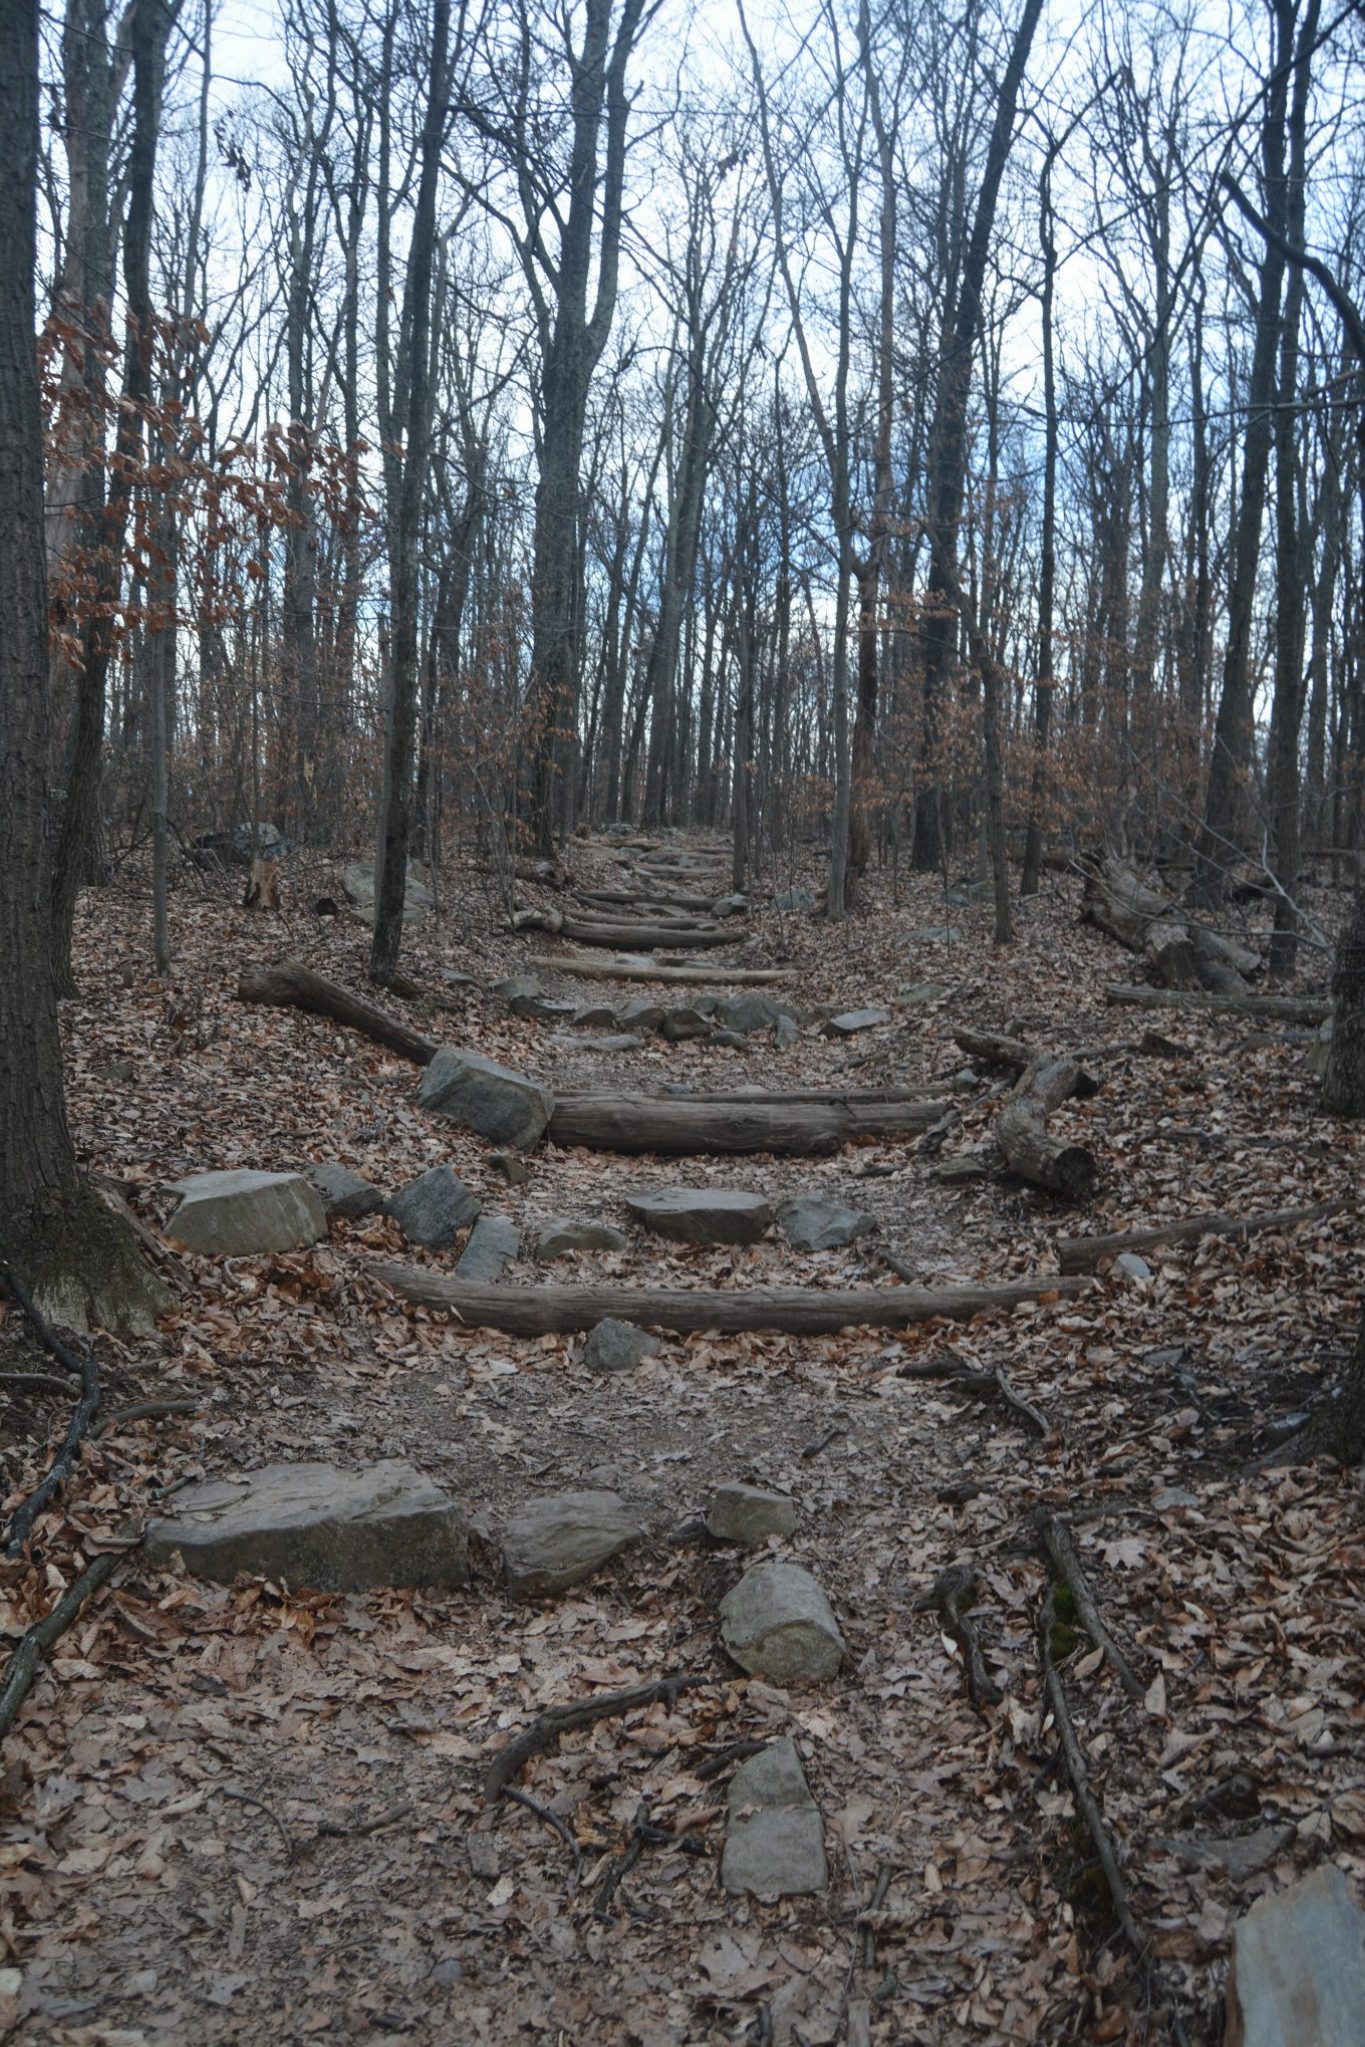
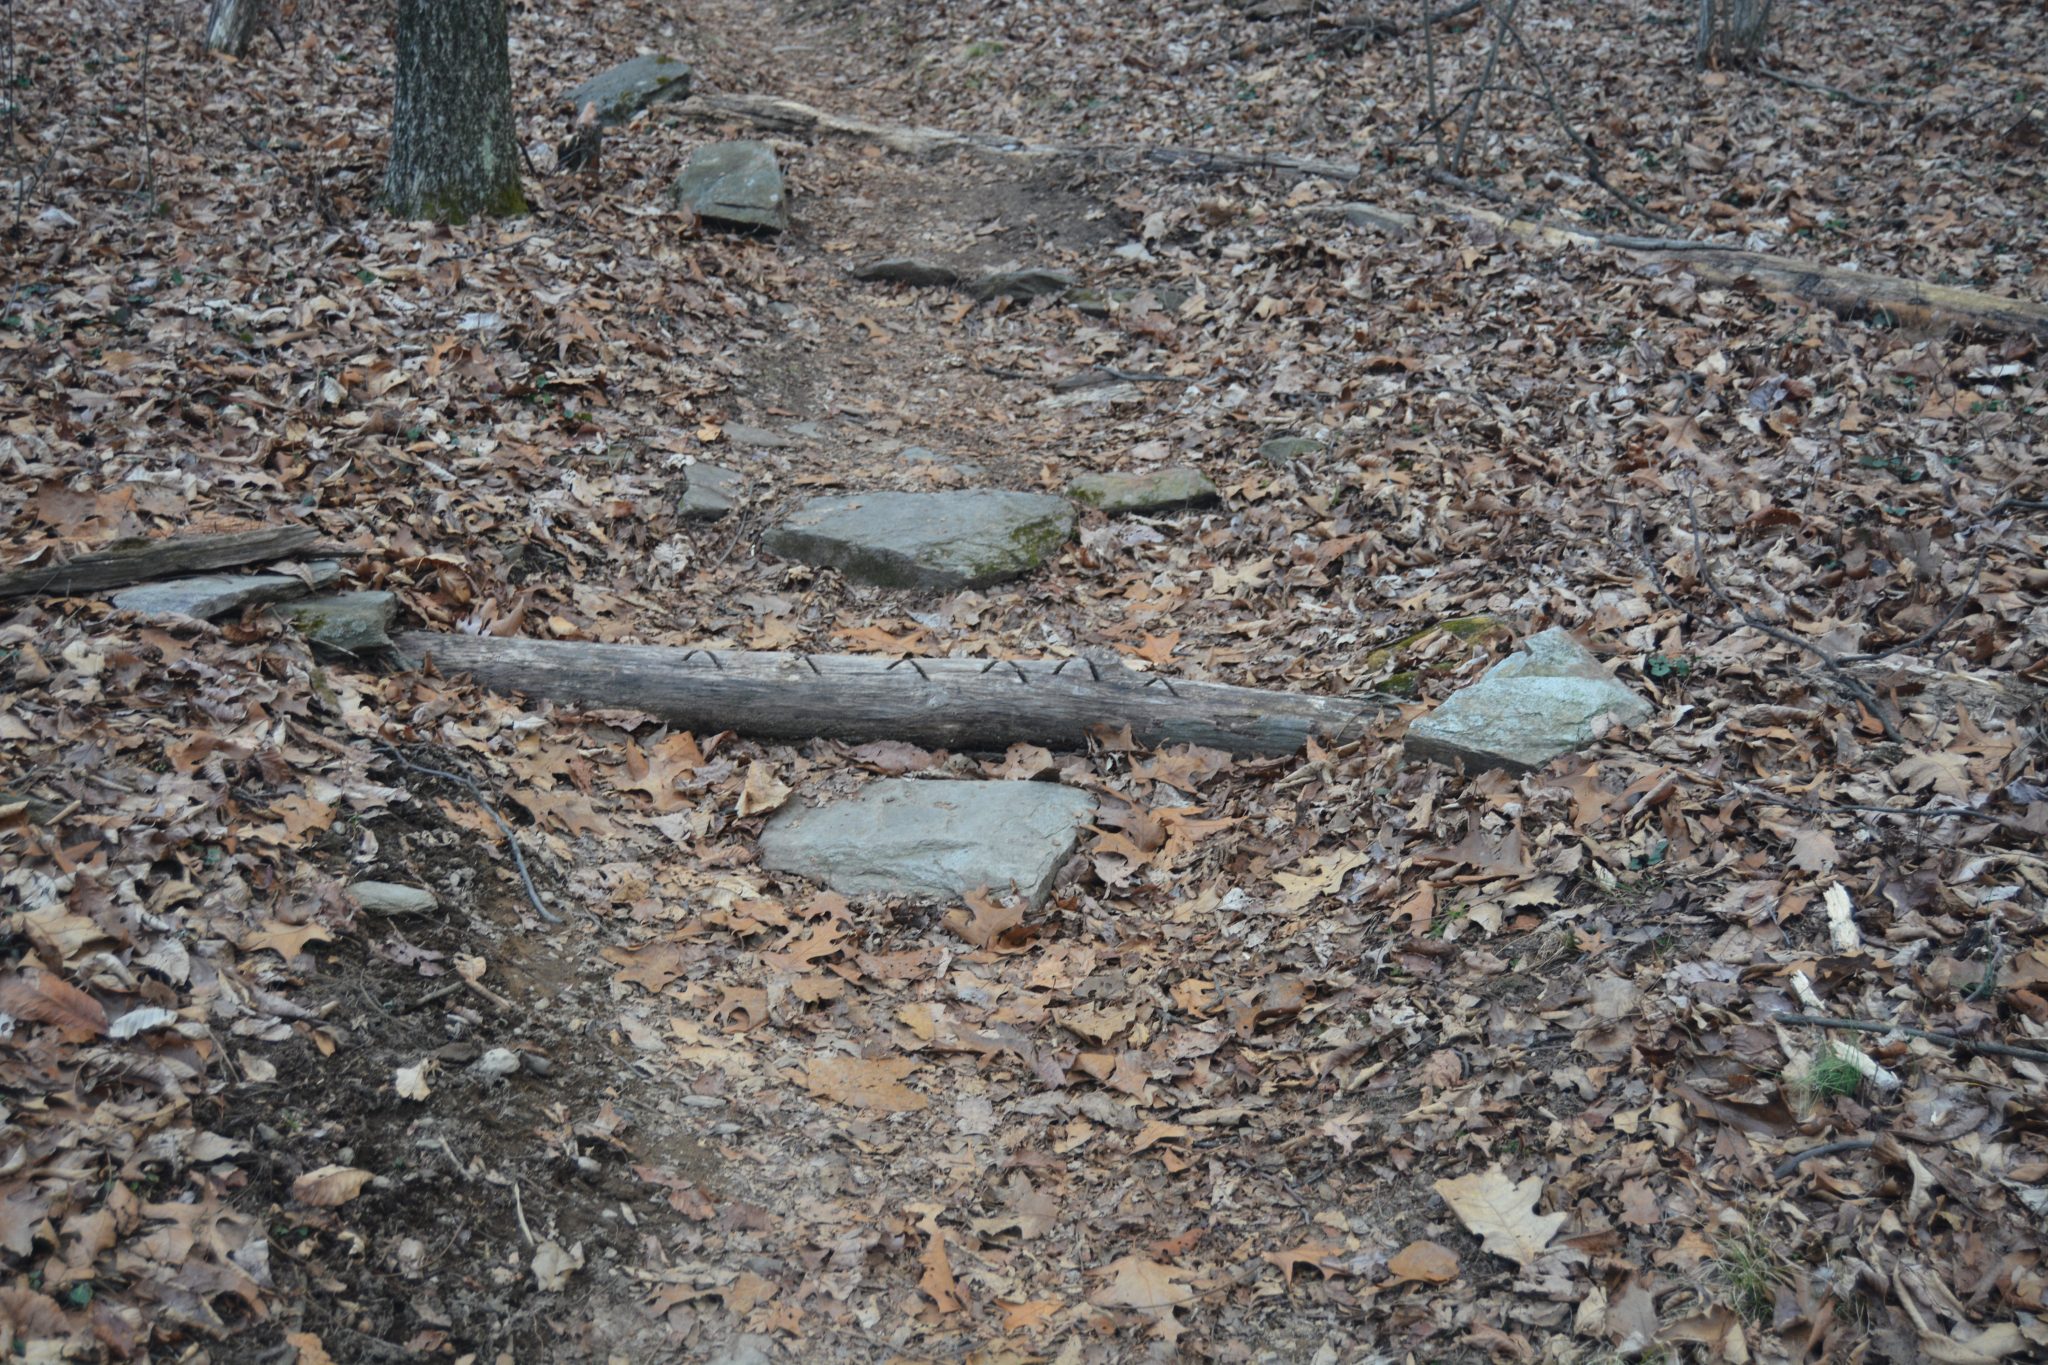
Often new maintainers of the Appalachian Trail will see many checkdams in a row, and try to replicate this too quickly. When you’re walking on the AT and come across these stepped rows of contiguous checkdams it’s usually the result of many years of diligently adding checkdams one at a time by the previous maintainers, and allowing them to fill then adding another checkdam. The well meaning new maintainer might get a little too overzealous and add many checkdams in a row all at once with the belief that this will speedup the process of rebuilding the trail tread. Yet there is only so much silt flowing in the water that can build up and it’s generally going to settle into the first checkdam only. So many times at these series of checkdams the logs will simply rot without any collection of sediment. So the recommended process is adding one checkdam every 60 feet or so, and waiting for it to fill before adding another. It’s simply a waste of effort otherwise.
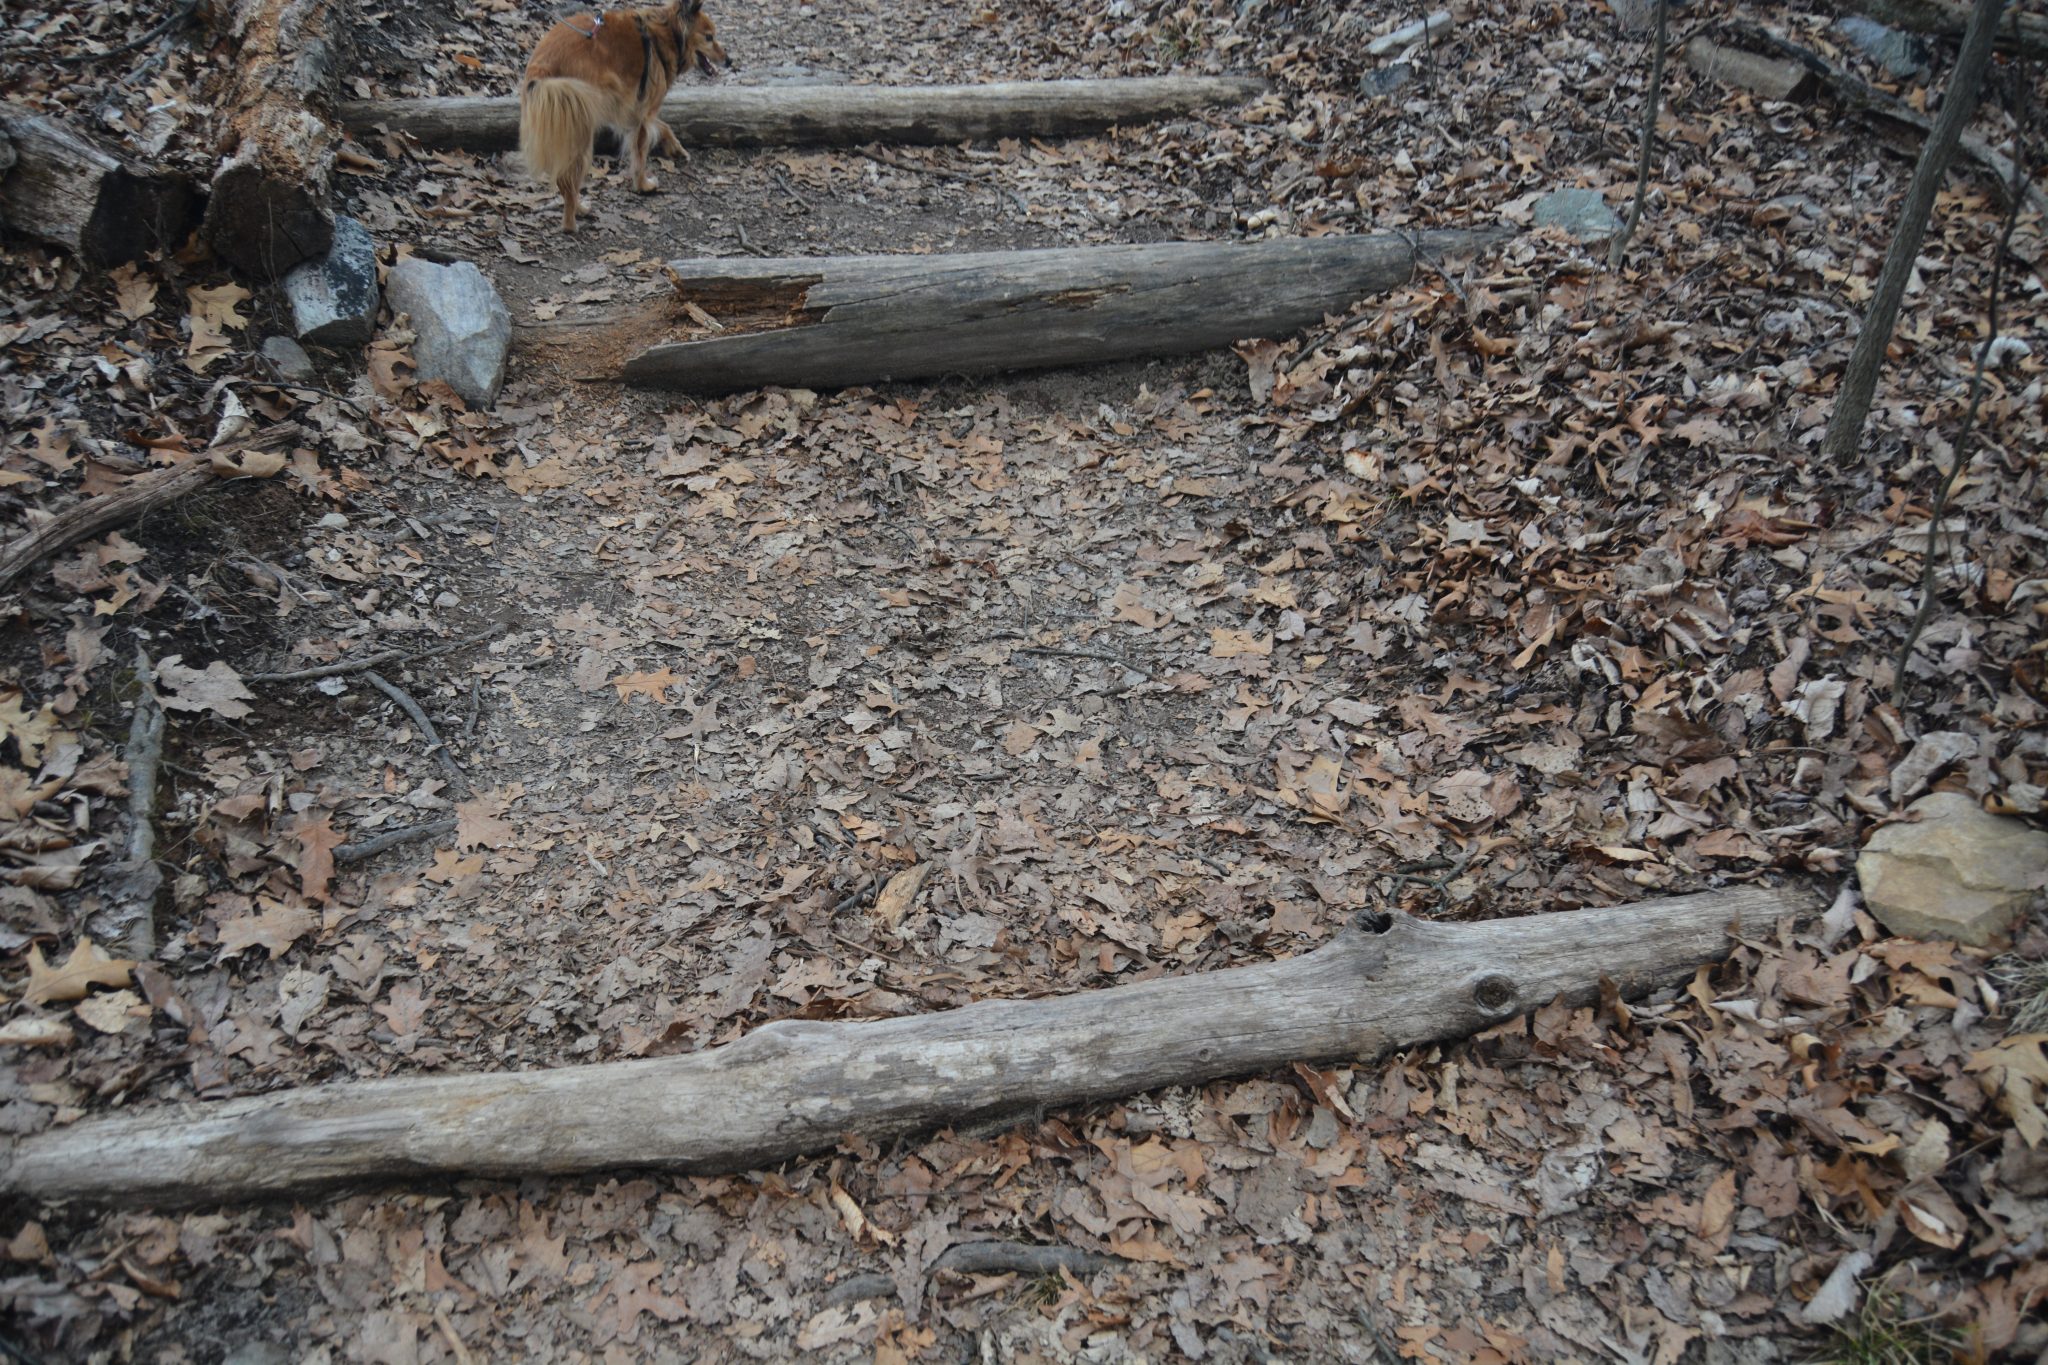
Dry checkdams – waterbar (bottom most log in picture) cuts off supply of silt
In the picture below is a closer look at the same location showing the checkdam logs rotting without filling.
Dry checkdams – wood rots before sediment builds up
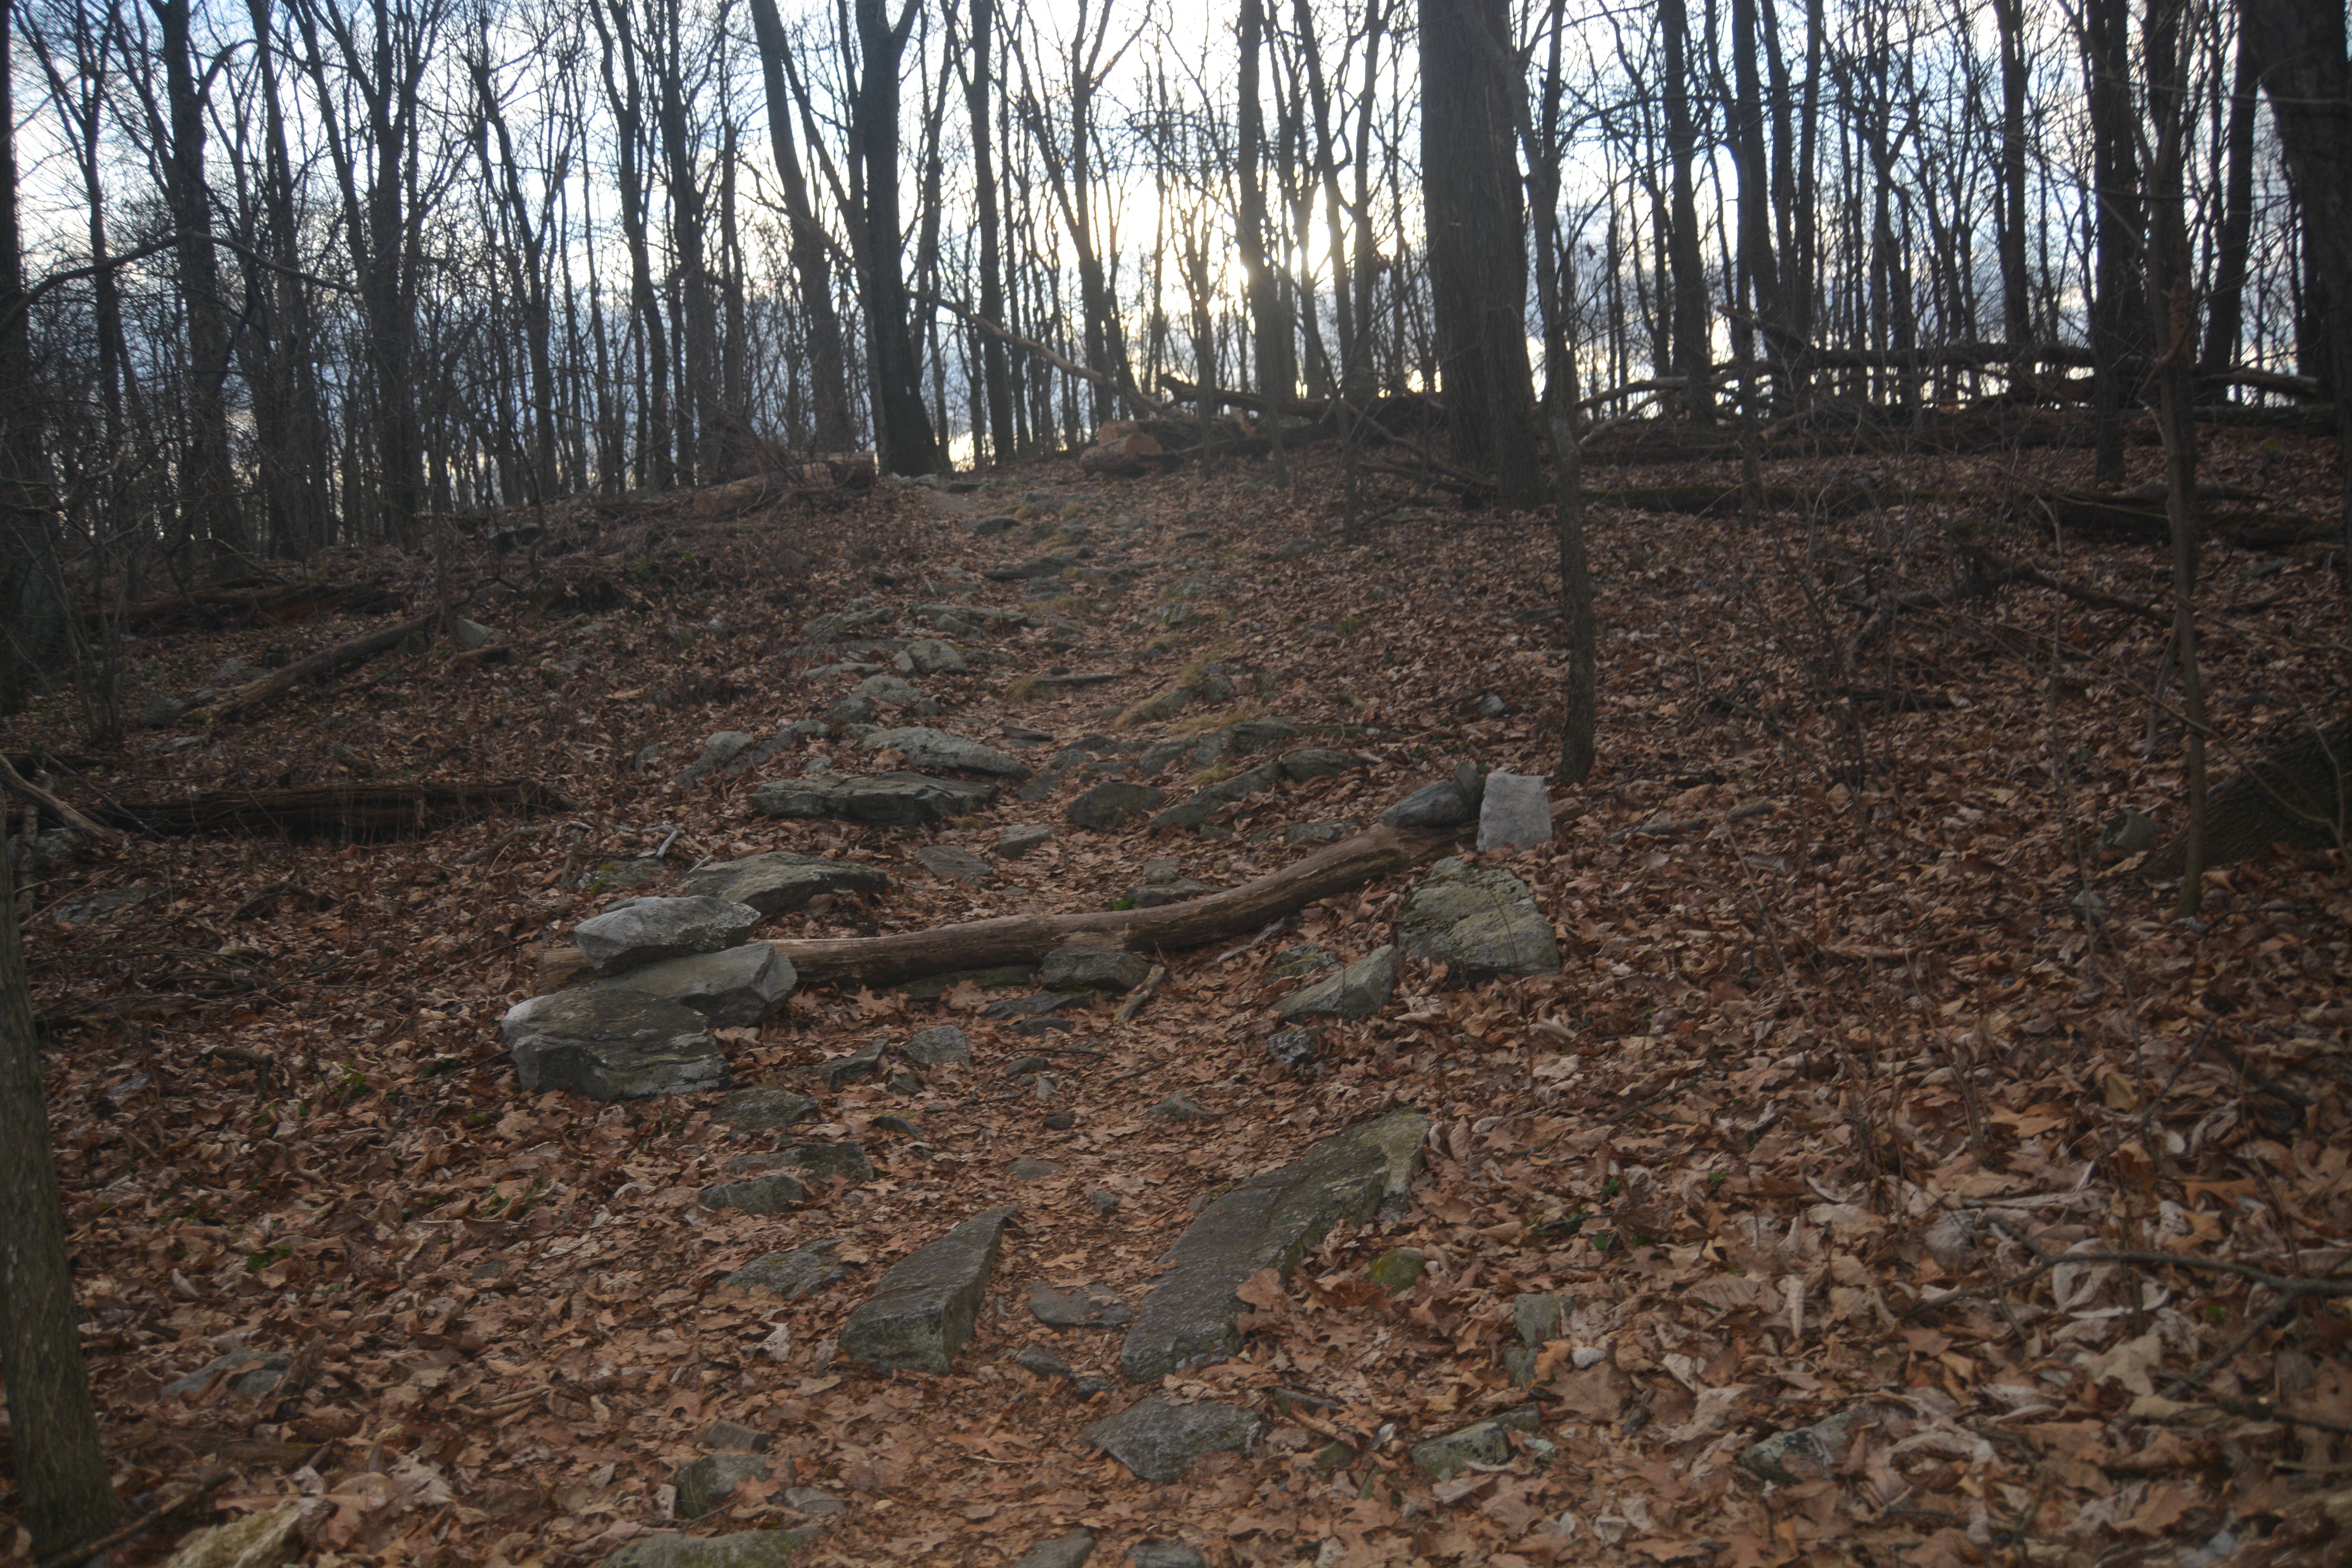
This picture is of a place on the AT with many checkdams placed in a row. This is an obstacle course to walk over and does no good for erosion. Besides doing no good since they are simply placed one after another and will simply rot away – it’s ugly and difficult to walk over. There is probably no harm done to the trail except for ugliness and stated in economic terms, there is lost opportunity costs in that the effort could have been applied elsewhere more useful.
Overzealous Application of Checkdams.
Perhaps even worse in these lonely hearts club checkdam sections, a little sediment will build up and block drainage so the dams simply hold water back and become pools. In severe cases, hikers will avoid these ponds by walking to the sides of the AT causing the trail to widen further and worsening the erosion problem rather then reducing it.
Checkdam ponds
Stopping Erosion Means There Must Be Some Erosion Occurring
As already mentioned, the silt that is building up in the checkdam is coming from the Appalachian Trail itself just uphill of the checkdam. So that 6 inch deep by 7 foot wide by 8 foot long section of soil behind the checkdam is actually from the tread in the 100 feet or so above the checkdam. You probably won’t notice the loss of a 1/4 inch of soil over such a long stretch but that is what is happening. A functional checkdam is placed in a location where there is active erosion in order to slow the process of erosion down. Placing a checkdam directly following a waterbar, which directs water away from the trail, will do little good because the soil and water have been redirected from the trail just above the checkdam. So this means that when installing checkdams, that waterbars are placed downhill of the dams as the water must flow into the dam with sufficient speed to carry silt, slow in the level dam dropping the payload of silt, pass on and finally get redirected away from the trail. So generally the two main methods of erosion control, checkdams and water bars are mutually exclusive although a water bar can be effective following a check dam but not visa-versa.
There is one other location where checkdams are of benefit and that is on steep grades where the foot traffic loosens the trail tread and the silt is push downhill either by the soles of boots, gravitation or rain. It’s these locations that hikers often confuse the erosion control function of checkdams with them being steps. A checkdam at this locations can function quite well with little or no water, and can immediately follow a waterbar as the movement of soil to fill the checkdam is the result of the base of hikers feet.
Where not to install check dams:
Too close to a waterbars. Waterbars direct water away. Checkdams need water to carry in the silt and dirt. Waterbars follow checkdams. A checkdam too closely following a checkdam with sit lonely and empty.
On a well drained soil section where water is simply draining away. Remember, checkdams work by slowing down water so the soil stops moving and deposits there. With no water, the checkdam is just an impediment.
One after another. In most cases, install one checkdam at a time and watch what happens before adding more. Simply adding checkdams one after another is a waste of effort as the first one will collect the soil and others sit empty. There are exceptions to every rule, such as steep slopes in highly used sections, so that’s why you should observe how the checkdam is operating to see if adding another would help reduce erosion more or simply site empty and look ugly.
This picture is of a many year old checkdam that was placed directly downhill of a waterbar and has not (and will never) fill because the water has been efectively removed by the waterbar. This is simply a trip hazard.
With no waterflow this checkdam won’t fill
Some folks install checkdams for checkdams sake – meaning they get placed in a location where they do no good as there is no flow of water and are nothing more then something to step over. The following picture is of a checkdam on a hill side on well drained rocky soil. This is on a busy section of the AT and you can tell it’s well drained as the leaf litter is laying on the tread and there are no signs of erosion visible. Rain water here simply drains into the soil.
This checkdam is on well drained soil and will never fill